Showing posts with label Christmas. Show all posts

Monday 13 January 2014

My handmade Christmas Prezzies 2013


I was very busy sewing this Christmas, mostly for my youngest niece who is 18 months old.

I made her a runway collection!


This consisted of:
Blue tank top, flowered and green pants/shorts and flowered cross-over top (flower fabric from Spotlight) - Butterick 3846, size L;
Pink dress - The Warhol dress, free pattern from MADE with an added ruffle at the hemline;
Flower print sun jacket - Kwik Sew 2596, View C, with added sleeves, no peplum and altered at the front so it is open and cool;
Ruched leggings - also Kwik Sew 2596 with a piece of elastic stretched and sewn at the lower outside seam to create the ruching.

Here she is in some of the pieces:

Kwik Sew 2596 (altered)

Kwik Sew 2596 (altered)

Butterick 3846

Butterick 3846

The Warhol dress- MADE

I also made owl cushions for both nieces. I looked at Google images and came up with my own design. I can't find the photo I took of the finished cushions, but here is Miss 18 months unwrapping hers (yes, she is always the centre of attention!):


and again later at home


For my older niece, I made this dress from light and airy, blue patterned cotton. I used Patrones magazine 30 (a recent edition full of children's patterns), dress No. 2. I had purchased the fabric for me, but thought it would be perfect for Miss 8, which it was. I raced back to Textile Traders for some more at the first opportunity!


The neckline and armholes are bound with a strip of lycra, folded in half, stitched to the inside of the dress first and then folded over the edge and stitched again, a variation on this method. The same turquoise lycra is used for the ruching.


I also made a skirt for my sister (not photographed) and these shoe bags for my (hard to buy for) brother-in-law.


Everyone seemed very happy with their meggipeg prezzies and the hard work was all made worthwhile (actually it made my year) when I received this letter from my niece with a picture of her wearing the blue dress and hi-top sneakers I also got for her.


Saturday 30 November 2013

Vintage sewing - Butterick 5208


You may remember me mentioning a haul of vintage patterns and a dressform that I excitedly got my hands on a few months ago. I have looked through the patterns many times and now, inspired by the vintage sewing contest, I've made one!


I chose this Butterick 'Misses' one-piece dress' pattern. I can't find a date on it but, comparing it to the other patterns I bought from the same lady, I estimate it to be from somewhere in the 1960s, the 70s at the latest. That's round about my vintage actually - perfect!


The pattern was a size 14 and had been cut out very neatly by its previous owner. Although I'm usually a size 10, the bust measurement was right for me so I went with the size as it was. This is my first time making a vintage pattern, but I'm guessing that the sizes have changed over the last 40 years or so!


I loved the lines and in-seam pockets of this dress pattern and, actually, it isn't a million miles from some modern patterns I've seen. However, I did want an up-to-date look, so I decided to leave off the collar and to use a knit fabric for the side panels. My main fabric was a gold linen-like fabric that I'd bought as a remnant in Textile Traders.


I drafted an all-in-one facing for the front and back neckline and armholes, according to this very helpful tutorial. This gives a nice finish on the inside when the zip falls open.

I topstitched all the seams and added a little diamonte charm to the zip pull.


The back has vertical shoulder darts, which give nice shaping and fit. The bust darts needed moving downwards and the side, knit fabric panels were taken in for a better fit. I didn't have enough gold fabric to make the dress any longer, so I added an interfaced panel of the knit fabric around the hem.


 Otherwise the fit was pretty well spot on!


 I must say that I'm well chuffed with my first vintage pattern. It took some minor tweaking to get it right, but I don't think it looks too out of place as we move into 2014.


It's so merry and bright, I might just wear it on Christmas day.

Thursday 13 December 2012

School Christmas markets

'You won't let me have fairy floss Mummy, so I'm buying it with my own money!'
Every year, my son's school has a Christmas market. It is a lovely idea that takes place in the evening a few days before school finishes for the year. Anyone who wants to (from the school community) can have a stall for only $5. Lots of children get busy making things or finding their old toys to sell. Mums and dads also get busy, sometimes making traditional food from their country of origin, making crafts (guess who) and helping the children get their stalls ready.

I have had a stall for the last four years selling children's clothes, jewellery and other crafts that I have made. This year, my boys were keen to get involved for the first time so half of my table was donated to their cause. We had a whole load of fart bombs, practical jokes in little packs and plastic cockroaches (as you do), which we had accumulated somehow, mostly as surplus goodies from the little bags we gave to friends at birthday parties. The boys were super-keen to sell these and also made some paper ninja stars to supplement their income.


Learning from experience, we got everything ready beforehand. We made the labels and packed things into containers which could just be opened and displayed on the table.

My merchandise consisted of simple bracelets, necklaces, baby tutus, baby ruffle pants and vest sets,  girls' clothes, fabric flowers and Christmas fairies (get the tutorial here). The best sellers at these school markets are things that appeal to children spending 50c to $2 of their pocket money. The mums sometimes buy a more expensive item, but mostly it's just the cheap rubbish stuff that sells. 


In the past, I have used a proper clothes rail for my display. This time I wanted to be able to set up and pack away quickly and carry things easily to and from the car, so I used my camera tripod. I adjusted the legs so it sat on the table perfectly and it packed away to nothing.


I covered a cork pinboard with fabric to display the jewellery and other knick knacks. This could be taken straight out of a bag and propped up on the table.


So, once all the merchandise was ready, I just needed a sheet for the table, a float in a lidded container, spare labels, sticky tape, pens, scissors and a money belt. At the last minute I grabbed snacks and water and I borrowed a trestle table from a friend. I didn't bring a chair as you tend to be standing up at these things anyway.


I used strong bags with handles, bought very cheaply from Ikea, to pack everything into so it was easy to carry.


We only had about 15 minutes to set up the stall as we were rushing there from the boys' guitar lesson. All the preparation paid off. We carried everything over in one trip and set up with time to spare. Stress-free marketing!

Here we are in business! Despite a rainy evening, the market was packed with people and we sold lots of stuff. As predicted, the fart bombs were the biggest hit. We had crowds of boys, girls and dads (!) around the stall buying them up. Later in the evening, loud bangs and dubious smells were emanating from all corners of the market!!


The boys earned $20 each for their hard work. LJ did ten minutes of busking with his guitar and was thrilled to get $3 from that! I sold a few things and generally had a fun time watching the children and soaking up the atmosphere. All in all, a very successful evening.

Quote of the day:

JJ (aged 7): 'What happens if Father Christmas is watching you on the toilet?'
Me: 'Oh, he doesn't watch people on the toilet. He doesn't want to see that'
JJ: 'But what if you are being bad on the toilet??!'
Me: 'Errr, well....(help!)'

Thursday 5 January 2012

Christmas presents I made WRAPup!

Hi All, as always, I got busy this Christmas and made lots of presents for family and friends. I got the children in on the action as well and we all had a lovely creative time.

Christmas was special this year as my mother-in-law came to visit from Canada. She loved being in Perth, but unfortunately there were some extremely minor medical issues on the flight over which meant that Mr Meggipeg had to fly to Hong Kong to collect her. The airline were very unhelpful and, despite having medical clearance for my MIL to fly home, they insisted that she be accompanied by a family member. This meant that Mr M has had to pay for a flight and go all the way back to Canada with her. We are currently out of pocket around $8000 for the flights and the travel insurance are being difficult about the claim as she continued to here from Hong Kong (where she had the initial problem) instead of retuning home. Anyway, I'm just looking at the positives - the family got to see each other after many years and spend Christmas together and MIL had a lovely holiday here. The other positive - I made most of our Christmas presents so the money saved there can help pay for MIL's very expensive holiday!!

So here we go. Present number 1 was a christmas skirt and matching hat for my niece made with crushed red velvet (a similar skirt is available in my Etsy shop).


The skirt has flower brooches that can be pinned to a t-shirt, headband, bag or just wherever!

She is such a sweetie

and the hat even made it out to the beach the next day!

Present number 2 was some maternity cropped leggings requested by another family member. These were so much easier than I expected and they look fab on. I will definitely be making more leggings.


Present number 3 was another request, but a rather odd one! My dad has exposed his skin to far too much sun over the years and is now paying the price. Rather than wear a long-sleeved shirt to cover up, he asked if I could make him some sun sleeves. However, he didn't want the usual style, which is close-fitting lycra that covers the arms, he wanted them loose and ventilated. I did my best and here is the final result:

They have bands to hold them on the upper arm and they cover half the hands, held by thumb holes (which are a bit folded inwards here, my Dad doesn't have conical thumbs! Unfortunately they are even weirder on than off and I told Dad that I wouldn't be offended if he didn't wear them. It is now Jan 6th and he hasn't worn them, despite several hot days since Christmas! Looks like thumbs down for these!!

Present number 4 was some gorgeous pictures that I got my boys to make for the grandparents. They drew messages and designs on squares of foil tape and made little beaded wire decorations, which we then placed in frames. These were fun to make and were very well received.


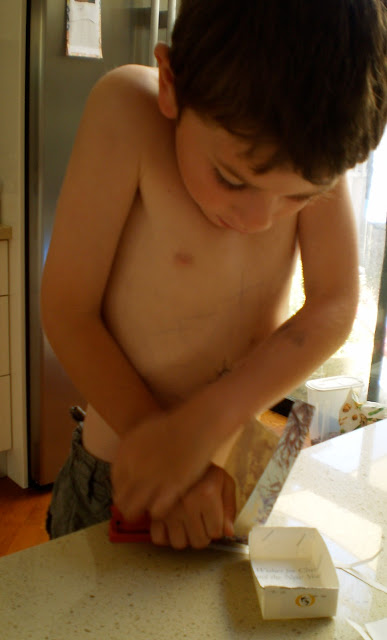
Present number 5 was also made with the boys. We found a simple recipe for chocolate truffles and made a large batch. They turned out as rather rustic looking balls but this just added to the charm! We then made little boxes from Christmas cards to put them in and we gave them to family and friends. This was such a sweet and simple gift and the boys were so proud to give gifts they had made themselves.


All in all it was a successful handmade Christmas. There were, of course, way more bought things than handmade, but hopefully these things made with love will be treasured and remembered as extra special - especially the sun sleeves ha ha!

I wish I could have posted this before the big day, but that would have ruined the surprise. Maybe you can get some ideas from these for presents throughout the year, or pin them for next Christmas. I may post a quick tutorial for the little boxes, they are such a good thing for the kids to make.

Cheers All,
 

Tuesday 27 December 2011

Easy fairy doll tutorial


These sweet little fairy dolls are so simple to make and they are sure to capture a little girl's heart. Perfect for hanging on the Christmas tree or bringing a smile to your face anytime.

This would be a good craft to do with a child. You could make all sorts of individual little characters.

Let's get started...

...for one fairy you will need:


- a wooden bead with a hole drilled through it
- a pipe cleaner
- scraps of fabric and ribbon or string
- wool, tulle strips or rope for hair
- marker pens
- any other embellishments you fancy eg. fake flowers, sequins, glitter

To make your fairy:

Cut a scrap of fabric into a circle of approximately 12cm or 5" in diameter. Cut a small hole in the centre. Also cut two arm slits roughly where the '2' and '3' are on the tape measure

Cut the pipe cleaner in half and fold one half in half again.

Poke the folded end through the hole in the bead and open it out.

Poke lengths of wool, tulle (or whatever you like to use as hair) through the hole in the pipe cleaner. Also poke through a piece of string or ribbon to hang up the finished fairy. I added a fake flower to this one.


Pull the pipe cleaner back through to firmly hold the hair in place and open out the ends. These will become the arms.

Fold the other half pipe cleaner in half and wind it around the fairy's neck a couple of times to secure it.

Twist a few times to form the body and legs.

And it's time to get dressed. Poke the body of the fairy through the hole in the dress and pop the arms through the slits.

Tie a ribbon around the waist of the dress.

Draw on a face, make any minor wardrobe and hair adjustments...and she's done!

I made lots!


You could add wings, sequins, glitter, hats. Go wild and have fun. I would love to see pictures of any you make. Email me or post them on my facebook page and I may feature them here.


I will be sharing this with some of the link parties listed at the bottom of the page.

LinkWithin

Related Posts Plugin for WordPress, Blogger...