Showing posts with label Blogging hints. Show all posts

Wednesday 10 December 2014

How to make a simple photo backdrop

Vogue 1313

I churn out hand made clothes at a rare old rate, not that you'd know it from my frequency of blog posts. One of the barriers to getting clothes on to the blog has been finding the time and location to take the photos. I love blog photos taken with beautiful scenery in the background, but it's just not always possible and has ended, more than once, with me feeling very embarrassed by the onlookers!

So, I dreamed up a way of making myself a photo backdrop that I could set up easily at home.

And here it is, neatly stored away:


I've mentioned before that I'm a member of Remida, an amazing place in Perth that recycles factory offcuts and the like. It was there that I headed to search for supplies. 

I collected a long (approx 2m), sturdy cardboard tube (try fabric stores for similar) and a large piece of white vinyl (approx 2 x 4m). The vinyl is great for this as it is fairly lightweight, holds its shape and doesn't tend to ripple. However, a large bed sheet or tablecloth may also work. 

The shorter edge of the vinyl was taped to the tube with strong packing tape. I then cut some rope to about 2.5 times the length of the tube, doubled it over and tied large bulldog clips to each end. The bulldog clips attach to each end of the tube for hanging and make it easy to switch the white vinyl for another colour backdrop if you so desire. If you don't have clips, just thread the rope through the tube and tie it (note that the rope will get in the way when rolling up the backdrop for storage with this method).

I searched around my house for somewhere to hang my new contraption and eventually settled on the balcony overhanging my back courtyard. There's enough room there to set everything up and there is lots of natural light. I installed two of these high-tech hooks on a fabric tie chopped off some garment or other. They now hang attractively from my balcony ready for the next photoshoot.


 This backdrop can be set up in about a minute. I stand my tripod and camera facing it and click away. Sometimes I even stand a mirror against the tripod so I can see if my dress (and myself) are looking their best for the pictures!

Vogue 1316

Once taken, the pictures can be quickly manipulated so they are ready for the blog. I use iphoto to crop them, quickly retouch any creases in the vinyl (eg. top, right of 'before' photo above). The above photo was taken on an overcast day so I clicked 'enhance' to brighten it up. Done!

Named Wyome jeans

The vinyl is also great as a background for inanimate objects, such as these jeans...


...and also works well for photos of pets and children. Awwww Truffle! Here he was putting his paw up for a treat. I just removed the hand and treat from the photo using Photoshop.

So, although I will still take photos in my natural habitat when I am able, this is a fantastically easy way of quickly producing some fairly professional-looking photos.

Tuesday 6 December 2011

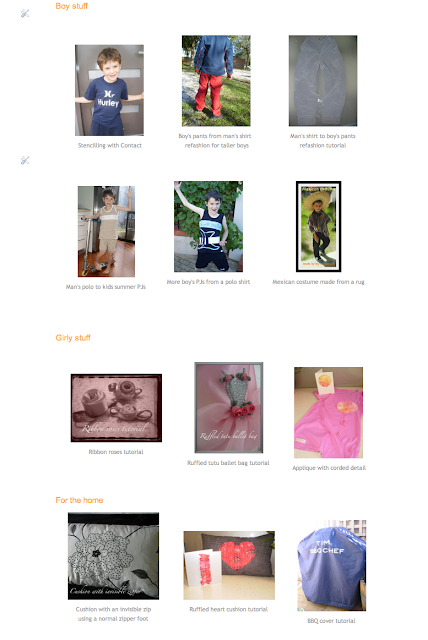
How to make a tutorial page on Blogger


Are you struggling to make a tutorial page for your blog that looks something like mine above? I spent hours and hours searching the internet for a method that worked and was simple to use. After much trial and error I finally found one and I've tweaked it into a user friendly format that I thought I would share. In my version you can click the picture or the caption to take you to the tutorial/blog post.

The most helpful resource I found was here and I adapted my version from that one. It is basically a table that you can add pictures and links to as needed. The pictures are always centred so everything looks neat and you can put as many per row of the table as you like. I chose a three column table.

I keep the code saved in Word and just copy and paste as required. Here it is:


[table border="0" cellpadding="5" style="font-family: Times; width: 700px;"][tbody][tr]

[td align="center" valign="center"]
[a href="FULL LINK TO BLOG POST">[img border="0"
src="FULL LINK TO JPG FILE ON PHOTOBUCKET OR BLOG"/][/a][/div]
[span class="Apple-style-span" style="font-family: 'Trebuchet MS', sans-serif;"]
[a href="FULL LINK TO BLOG POST AGAIN"]
CAPTION FOR IMAGE[/a][/span][/td] 

[/tr]
[/tbody][/table]


Change all the pink '[ ]' to '<' and '>' so the html code works properly

Repeat the above text from [td] to [/td] for each column of the table (i.e. each time you add a tutorial picture to your table)

To start a new row copy from [table...] to [/table] for each subsequent row.


NOTES:
- You need to be in the 'html' mode in a new page in blogger.
-You may need to change the width from 700px (first line) to fit your blog. 
-To get the link to your jpg photo file, either save the picture into a photo sharing site like Photobucket or Flickr and copy the url from there, or open the picture in your blog and right click on it to copy the url.
- If you want more than three pictures per row, just copy the '[td] to [/td]' part as many times as you need.
-Switch into 'compose' mode to check how it's looking. You may need to resize your pictures. I just make them 'small' by selecting that option on the photo itself. 
-You can add categories (eg. 'Girl's clothes', 'Crafts' etc.) in 'compose' mode. Begin a new table below each category heading.

I hope that makes sense. Please let me know if you have any questions or comments, I love to hear them.

Good luck!

Wednesday 12 October 2011

Oops, I think I just tweeted!

Well my DH has told me that if I want to promote this blog then I need to be on Twitter. I was hoping to avoid another social network site as I spend far too much time on the internet as it is! So, kicking and screaming, I have opened meggipeg on Twitter and I will tweet about all manner of exciting things I create, fashion finds, DIY dreams etc.

You can follow my (very new) twitter acount using the flag on the right of the blog. You can also use the other flags to follow me on Facebook, Pinterest or send me an email. By the way, aren't the flags cute - I got them from here. I would also love you all to become blog followers. I love to blog and would be so happy to see some of my lovely readers' faces.

Go wild xx

Monday 8 August 2011

Playing with Wordle

Wordle: meggipeg wordle 1         Wordle: meggipeg wordle 2

I could spend hours playing on the Wordle site. You can make pictures with any words you choose.

It took me a while, but I've worked out how to make these a little larger without losing quality. If you just save the wordle html text, the images end up the size seen above. To enlarge them, you need to take a screenshot of just the part of the screen with your wordle on it (control+shift+4 on the Mac, then hold keys down while you select the part of the screen you want). Then you get a file of your image that you can upload to your blog.

I think I'll try one out as my blog header. Then I'll finish my lunch and wander into the sewing room to see what inspires me :)

LinkWithin

Related Posts Plugin for WordPress, Blogger...