Showing posts with label Boys. Show all posts

Sunday 24 August 2014

Meet Edward Tulane


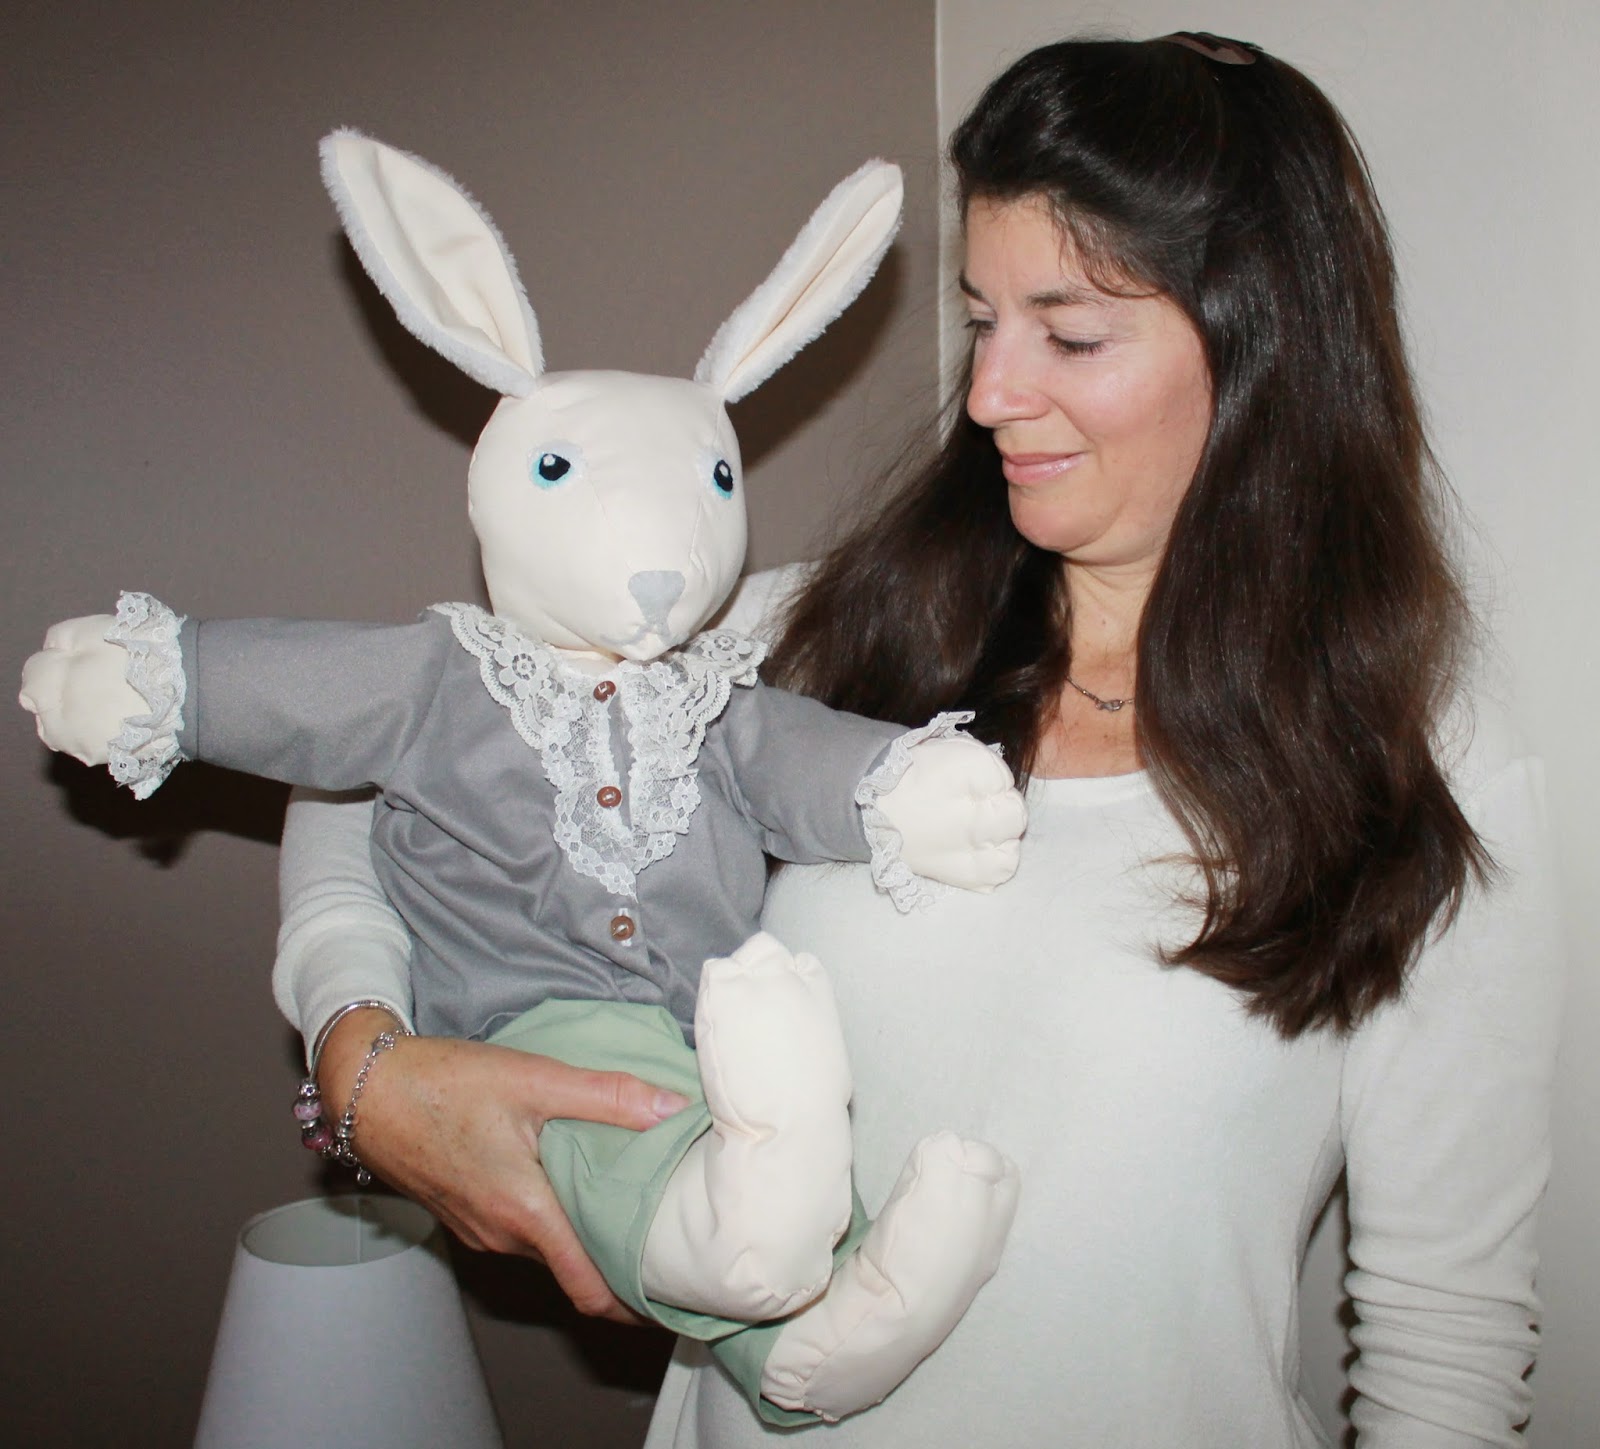
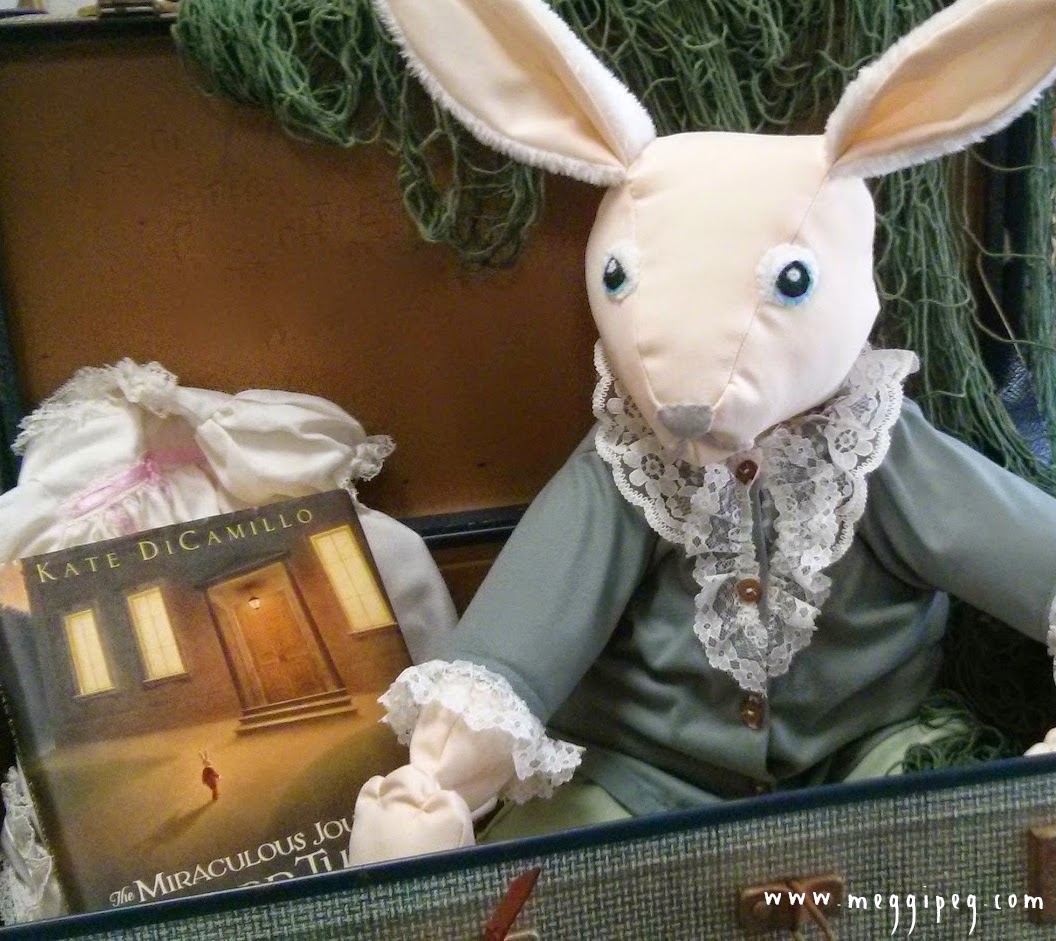
Not long ago, the delightful teacher of my younger son's class came to me with a proposition. She was planning to read 'The Miraculous Journey of Edward Tulane' to the class and wanted a stuffed rabbit to use for associated activities. She had searched everywhere for a rabbit that was distinguished enough to use as Edward, but had not found anything. Well, it seems that word of my sewing addiction has reached the school as the teacher asked me if I could make something that would fit the bill.


I don't make many toys, but creating this adorable rabbit was certainly a project I could enjoy. I googled as many images from the book as I could find. I also found a lady who has posted pictures of her own beautiful Edward Tulane stuffed rabbits. I found a book in the library ('Creative soft toys to sew' by Creative House) with a rabbit pattern that I thought I could modify to look the part. 


I decided to make everything from materials I already had, which was not difficult given the resources in my bursting-at-the-seams sewing room.

The main body is made from a lovely off-white cotton (op shopped) and the ears are made from scraps of white fur fabric left over from dance costumes. The clothes are also made from scraps. I used felt for the eyes and nose.


After I had made and stuffed the head, I slimmed down Edward's face with hand-stitched darts below the ears. I wanted the ears to stand up as in the book illustrations so inserted copper wire into each one. I used long wire so it also ran through the head and down into the chest area to provide head support.


I layered the parts of the eyes and handstitched each layer together before sewing the eyes to the head. I thought that was safer than trying to embroider the eyes straight on.


The clothes were made using a pattern for baby clothes, which I modified to fit Edward. I tried to make the colours of the clothes and the lace embellishments as authentic to the book illustrations as possible. I also added some hand stitches on the hands and feet to make rabbitty fingers and toes.


I loved this project and was over the moon with the final result. I think my Edward turned out a lot like the rabbit in the book and, although I am not a soft-toy fan, I was a bit sad to have to let him go!


I took him to JJ's class the day after I finished him. Since then, I have had so many children come up to me and say how much they love Edward. The teacher is reading the book to the class at the moment and the children get to take turns holding Edward during the story. It makes me all glowy every time I think about it. The class also made me a lovely card and the teacher bought me a beautiful scarf to say thank you. Thank YOU Mrs G for all you do for the children and for involving me in this fun project.

Tuesday 11 June 2013

Sk8tr bois (Burda 9592)


After much pestering from my boys, I finally got round to making the 'leather' jackets that I'd promised them last year.

I used Burda 9592 (now discontinued) that I picked up for $5 at the shop where I was having my sewing machine serviced. Some time later I found this dark, chocolate brown pleather for 40% off in Spotlight. I bought it and it sat in my cupboard for several months, through the long, hot summer, while JJ (seven) periodically asked when I was going to make his jacket. When the weather turned cold I ran out of excuses, so I set to work on View A (times two).


The pattern I had was for age 10-15. That was fine for LJ (ten), but too big for JJ. Some down-scaling was in order. To do this, I used a very handy method from SewStylish.com that I had found ages ago and saved for just such an occasion.  
Source
The method involves drawing lots of radiating lines on each pattern piece and applying simple maths to work out where the lines on the smaller (or bigger) pattern should be drawn. The resulting, scaled-down pattern seemed to go together well, so thumbs up for this method.


The next obstacle was that the pattern specified shearling-type fabric (leather with sheepskin backing) for View A as this view is styled with raw edges to show off the wool lining. Well, even in sheep-rich Australia I don't know where I would find such a fabric, much less afford to buy it for children's jackets! And besides, I'd already bought this pleather so I had to make it work. In the end, I used some brown polar fleece to underline every pattern piece. This gave the jackets warmth and allowed the raw edge design detail to be utilised. 

Suffice it to say that the pattern re-sizing and cutting out the pieces for two jackets in pleather and fleece took a blinking long time!

Raw edges on cuffs, pockets and hem.

I have to say that JJ really helped the process (not) by popping into the sewing room at regular intervals and asking when his jacket would be ready!

Raw edges on collar and yoke.
Once I started sewing, these jackets went together reasonably quickly. I treated the fleece and pleather together as a single layer for each piece, which worked fine.


I like the contrast provided by the fleece on the inside of the collar and on the raw edges of the hem, cuffs, pockets, collar and yoke.


The boys are very pleased with their jackets, so Yay for Mum-sewing! I wanted them to pose by this graffiti wall for the pictures, so I had to bribe them with a visit to the adjacent skate park. 


I had to take these photos in 2 minutes flat, before they raced off to do this:


and this:

That's my boys :)

Tuesday 22 January 2013

Jacket rashies for the beach (Jalie 2795)


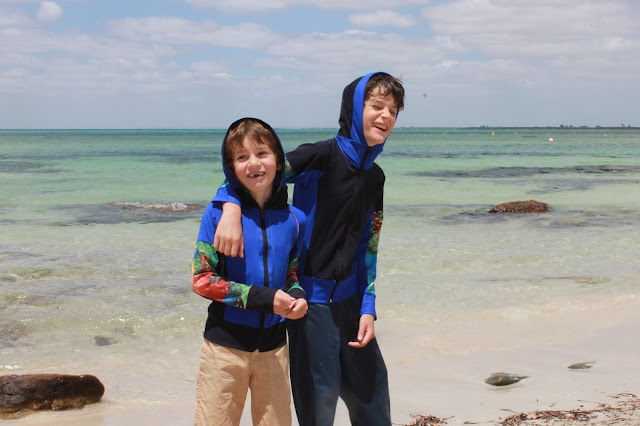
We have just returned from a five-day camping trip to the idyllic, beachside town of Dunsborough (approx. three hours drive south of Perth, Western Australia). I knew we would spend most of our time on the beach while we were there, so I wanted to make new 'rashies' (rash vests/sun shirts) for the boys, with hoods to keep their necks protected from the sun.

While flicking through my patterns and pondering how to attach a hood to the standard t-shirt style rashie (like this one I made for LJ, with matching shorts and hat), I came across my trusty Jalie 2795 jacket pattern. The more I thought about it, the more it seemed to be a good idea. The front zip would make it so much easier to get the rashie on and off (usually after swimming, I am faced with a wet child shouting "help!", their arms and head trapped by the too-tight neck of the inside-out rashie. Many's the time someone has almost lost an ear!). Also, this pattern is slim-fitting for swimming and the hood is exactly what I was looking for.


So it was decided. Another two Jalie 2795 jackets coming up quick-smart for the holiday. 

I have a large stash of lycra thanks to a fantastic sale at a local swimwear manufacturer late last year. The boys chose the aquarium print lycra fabric and I chose the black and blue lycra to go with it. I switched the positioning of the black and blue on each jacket so I would be able to quickly tell them apart as I dug around in the swimming bag while running after the boys reminding them to put their rashies on!


I followed the pattern exactly except that I left the pockets off as I thought they'd just get full of sand. I went up two sizes from the measurements of each of my sons. This worked well for JJ (aged 7), but LJ (aged 9) could have done with some extra length in the body and sleeves of the jacket. He is a beanpole. The measurements on the pattern are for a girl (here is a Jalie 2795 jacket I made for a seven-year old girl) and I think the different proportions of an older boy need to be taken into account when deciding on sizing. I'd say the best rule would be 'if in doubt, go up another size or two'!


Before I made these, I toyed with the idea of adding a sun visor to the hood, but I decided against it in case it hampered the swimming. Wearing a cap inside the hood works well on dry land. 

I cut both jackets out together and sewed them one at a time, so as not to mix up the numerous pattern pieces. Once cut out, they took around two hours each to sew and were ready in time for the trip.

These jackets were invaluable on the holiday. They were great for keeping the sun off, but the boys also used them, once dry, for warmth once the cooler evenings arrived. They were light and easy to carry around, looked good and, most importantly, easy to get on and off. Hooray!

Thursday 13 December 2012

School Christmas markets

'You won't let me have fairy floss Mummy, so I'm buying it with my own money!'
Every year, my son's school has a Christmas market. It is a lovely idea that takes place in the evening a few days before school finishes for the year. Anyone who wants to (from the school community) can have a stall for only $5. Lots of children get busy making things or finding their old toys to sell. Mums and dads also get busy, sometimes making traditional food from their country of origin, making crafts (guess who) and helping the children get their stalls ready.

I have had a stall for the last four years selling children's clothes, jewellery and other crafts that I have made. This year, my boys were keen to get involved for the first time so half of my table was donated to their cause. We had a whole load of fart bombs, practical jokes in little packs and plastic cockroaches (as you do), which we had accumulated somehow, mostly as surplus goodies from the little bags we gave to friends at birthday parties. The boys were super-keen to sell these and also made some paper ninja stars to supplement their income.


Learning from experience, we got everything ready beforehand. We made the labels and packed things into containers which could just be opened and displayed on the table.

My merchandise consisted of simple bracelets, necklaces, baby tutus, baby ruffle pants and vest sets,  girls' clothes, fabric flowers and Christmas fairies (get the tutorial here). The best sellers at these school markets are things that appeal to children spending 50c to $2 of their pocket money. The mums sometimes buy a more expensive item, but mostly it's just the cheap rubbish stuff that sells. 


In the past, I have used a proper clothes rail for my display. This time I wanted to be able to set up and pack away quickly and carry things easily to and from the car, so I used my camera tripod. I adjusted the legs so it sat on the table perfectly and it packed away to nothing.


I covered a cork pinboard with fabric to display the jewellery and other knick knacks. This could be taken straight out of a bag and propped up on the table.


So, once all the merchandise was ready, I just needed a sheet for the table, a float in a lidded container, spare labels, sticky tape, pens, scissors and a money belt. At the last minute I grabbed snacks and water and I borrowed a trestle table from a friend. I didn't bring a chair as you tend to be standing up at these things anyway.


I used strong bags with handles, bought very cheaply from Ikea, to pack everything into so it was easy to carry.


We only had about 15 minutes to set up the stall as we were rushing there from the boys' guitar lesson. All the preparation paid off. We carried everything over in one trip and set up with time to spare. Stress-free marketing!

Here we are in business! Despite a rainy evening, the market was packed with people and we sold lots of stuff. As predicted, the fart bombs were the biggest hit. We had crowds of boys, girls and dads (!) around the stall buying them up. Later in the evening, loud bangs and dubious smells were emanating from all corners of the market!!


The boys earned $20 each for their hard work. LJ did ten minutes of busking with his guitar and was thrilled to get $3 from that! I sold a few things and generally had a fun time watching the children and soaking up the atmosphere. All in all, a very successful evening.

Quote of the day:

JJ (aged 7): 'What happens if Father Christmas is watching you on the toilet?'
Me: 'Oh, he doesn't watch people on the toilet. He doesn't want to see that'
JJ: 'But what if you are being bad on the toilet??!'
Me: 'Errr, well....(help!)'

Monday 1 October 2012

Tumble dying with a stencil to make a cool t-shirt


After watching me making my ombre dyed, polka dot t-shirt, my boys were desperate to get in on some Tumble Dye action. After some discussion, they decided on a Party Rock Gym design. There are images all over the internet for this and, after looking at a few, I came up with this design of my own using MS Word and Powerpoint.

If you would like to use my design, you can download it here and resize as necessary.

I printed the design on to normal paper, covered it in clear Contact plastic film (only to keep it strong enough to be used more than once) and cut out the lines with a scalpel.


The inside bits of the letters are saved and stuck to the bottom corner of the stencil. If you can, I would recommend cutting out letters as I've done for the circular part of the design, leaving a bit of paper to hold any middle bits in place, as for the 'P', 'A', 'R' etc. The little connector bits hardly show in the finished product.

After being asked at least 67 times if it was ready yet, I finally finished cutting out the stencil! It was then laid on to a square of t-shirt fabric, placed outside on newspaper and I let the boys loose with the dye spraying!


They were actually really careful and loved doing it.

My tips for children using these dyes would be:

  • Make sure the nozzle is pointing in the direction you want the dye to go (yes, we learned this the hard way!); 
  • Spray approximately 10cm from the fabric;
  • Don't saturate the fabric with dye as it will run under the stencil, just gradually build up to the intensity you want; 
  • You can mix colours to get fantastic effects, but be careful not to mix more than two colours or you get muddy brown.
  • It's worth dyeing a square of fabric, rather than the actual t-shirt in case of mistakes and resulting meltdowns (we had both!).


When the dyeing was finished, we blotted off excess dye that was pooling on the stencil using paper towel and carefully lifted the stencil away from the fabric. I ironed the designs to set the dye, trimmed the edges, then stitched them on to t-shirts (which I'd also made, it was a busy day!) for the boys.


I used a strip of the trimmed fabric to sew a zig-zag along the side of the t-shirt for extra coolness!! I've been saving all my dye-covered scraps to use as embellishments for future projects.


The boys are SO thrilled with their t-shirts. They wore them to their hip hop class and proudly announced that they'd made them themselves when the teacher admired them!

A very rewarding project, which could be adapted for varying ages.

Thursday 26 July 2012

Man's shirt to boy's pants refashion

I love a refashion and this is one I have done before, although for a much younger boy. LJ, aged nine, needed some pants to play in during the school holidays. I had this old shirt lying around so decided to see if I could get a bigger pair of pants out of one shirt.

Front - stripe at knee is shirt yoke, lower section is shirt sleeve.
Well, it took a little bit of piecing together, but it is definitely possible. I basically followed my previous tutorial. The back pattern pieces were placed on the front of the shirt to make use of the shirt pocket as a back pants pocket. The front pieces were cut out of the shirt back. The shirt was too short to fit the whole pattern piece on, so I left off the lower legs to add later. These were pieced together from the sleeves and other scraps. The shirt was also slightly too narrow for my pattern pieces, so I added the black denim strips to the sides of the pants. I really like the stripes on the finished pants.

Back - lower leg pieced together with sleeve and scrap pieces.
These were easy to make and the jigsaw puzzle made it a bit more interesting. I think the extra seams add a nice cargo-style look actually. They are soft and comfortable to wear on a casual day.


It was quite entertaining taking these photos as the man in the background had dropped his keys in the river. Here he is phoning his wife.


He then spent quite some time trying to fish them out with a fishing net, to no avail.


Eventually his wife arrived with some board shorts and goggles. He dived down and managed to retrieve the keys! I wanted to get a photo but didn't want to embarrass the poor chap further! We just gave him a round of applause instead.

LinkWithin

Related Posts Plugin for WordPress, Blogger...