

Anyone know what this is?
It is a sustainable fabric with a zero carbon footprint and it has been completely sourced from my local area.
Here's a close up:

Still not sure? Here is another hint:

It's dog fur felt! Yes, I clip my dog on the kitchen bench. Don't judge!
Before you wonder if I've gone completely mad, let me explain. Nicki, of This is Moonlight, has challenged Perth sewing bloggers and anyone else from around the world to use 2015 to research local, sustainable fabrics and to produce one wearable outfit using these fabrics by the end of the year. We have been given the south west of Western Australia as the region from which our fabrics or materials can be sourced. Although this corner of WA is bigger than many entire countries, it is actually rather empty and fabrics made entirely from animals or plants in the area are very difficult to come by.
 |
| Natural dyeing using Australian Eucalyptus leaves by India Flint |
So, our small, but enthusiastic, band of Perth Sewers, led by Nicki, have embarked on the 'One Year One Outfit' mission. The quest will involve excursions to sustainable farms and hidden wool shops. We will investigate unusual fibres like hemp and silk for their suitability and adherence to the criteria of the challenge. We will even congregate for a workshop in natural dyeing using leaves and flowers collected from the local bushland. It is all very interesting and exciting.
We would love you to join us using your own local area as your source for fabric. Contact me or Nicki for more information.

Anyway, back to the dog-fur felt and whether I should use it for my outfit. The advantages are that it is local, free and I have an endless, if slow-growing, supply. The disadvantages are that it is a bit warm for our climate, is itchy and it falls to bits when handled. Either I need a new fabric source or a way to get the fur felt to hold together better.
Let me show you how I made it. Actually, it was my two boys who made it. First we clipped fur from Truffle the cavoodle (King Charles cavalier/poodle cross). From now on I shall refer to this fabric as 'truffoodle'. I don't know whether poodle-type fur makes different felt to non-poodle dog hair. Something for future experiments.
The fur was laid out on a piece of bubble wrap.

We then wet it with hot water and hand soap and patted it down flat. In retrospect we may have used too much water and soap.

The fur was rolled up in the bubble wrap and rolled back and forth, like a rolling pin, many times.

There were lots of oohs and ahhs when the bubble wrap was unrolled to reveal the exquisite truffoodle fabric.

Now before you get too worried about my future sewing direction, the truffoodle fabric was just a bit of fun. I won't subject you to pictures of me in a flaking, dog fur ensemble any time soon. However, it did turn out to be useful preparation for my first foray into wool felting.
Yesterday, the Perth one-year-one-outfitters met at Bilby Yarns for some local wool research. The wool and equipment in that shop was fascinating. I am not a knitter, so looked a bit blankly at the balls of wool, but once I spotted the unspun, West Australian wool in delicious, natural colours, the spinning wheels, the weaving looms and the beautiful felt samples, I was excited. The two ladies who run the shop were very generous with their time and knowledge. They talked us through the wool production, showed us how to use a spinning wheel and then gave a felting demo.
The felting, for me, was the most interesting, and achievable, method for producing purely WA sourced, sustainable fabric. This was the method we were shown:
Fibres of combed and washed wool were pulled out in clumps and laid on the table all in one direction.

A second layer was placed in a perpendicular direction then a third layer in the same direction as the first layer.

A small squirt of dishwashing liquid was added to a cupful of hot water. Olive oil soap can also be used for a more natural alternative. The soapy water was sprinkled over the wool to dampen it.

The water was incorporated into the wool and flattened using a scrunched-up plastic bag to avoid the wool fibres sticking to the hands.

At this stage, additional wool fibres in different colours can be added to create a design. The edges of this piece were folded in to make them straighter.

The whole thing was then popped into a plastic bag,

wrapped in bubble wrap and rolled back and forth many times.

The resulting felt was rinsed in water and rolled in a dishcloth before being dried.

Just try keeping your hands off the resulting felt!

After seeing all this, I felt (ha ha) that wool felt should form part of my sustainable, local outfit. There were many beautiful colours to choose from, but I eventually decided on this combination of three natural sheep colours. I bought 200g for $16, which I hope is enough for a skirt.

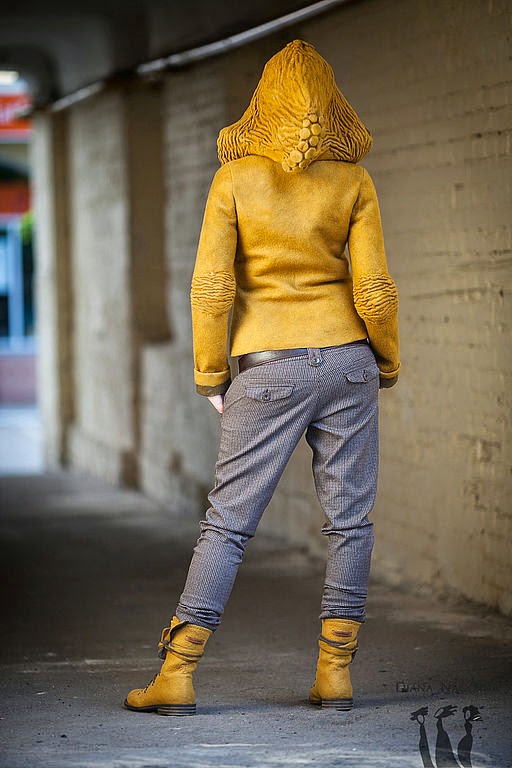
I can't wait to get started, especially after finding this inspiration on a Russian website:
 |
| Source |
 |
| Source |


