Showing posts with label knock-off. Show all posts

Tuesday 26 February 2013

Retro copy cat

Left: image from here. Right: my own version.
I love being inspired by ready to wear (RTW) items. I know some bloggers disagree with blatant copying, and I do too in many instances. I would never copy something and then try to sell it and I think to be 'inspired by' something is better than to copy it. However, I also think that it's probably ok for one little blogger to copy one little item from one big designer. Especially, as in this case, it's to enter the fab RTW contest on Sewing Pattern Review.

To find inspiration for this project I trawled through the websites of some of my favourite designers and then searched some more on Net-a-Porter. I kept coming back to this dress by Roksanda Ilincic. I loved the striking combination of colours and the retro lines.

Source
So, how to create it?

My starting point was to use the lovely pattern by Savage Coco for the 'Elegant Escape Dress'. I traced the front and back pattern pieces and played around adding lines where the different fabrics would join together. My French Curve ruler came in vary handy here. Once I was happy with that, I retraced each separate piece and added seam allowances. I took a lot of care with this step as I wanted the pieces to fit together very neatly.


The front pieces came together nicely. However, I wanted the navy side piece to be cut as a single piece that wrapped from the front to the back. It was here that things became more difficult. The more pattern pieces I made, the more complicated it was to work out if they would fit together properly. My brain began to strain! By the time I'd made all my paper pattern pieces, I had lost all confidence in the thing working at all. It was at that point I did the unthinkable (for me at least) and made a muslin from an old sheet! It turned out not really to have been necessary (muslin schmuslin) as everything fitted together as I had hoped.

So I began to cut my fabric. I used 'mechanical stretch polyester' from Textile Traders. You can see the single navy pattern piece at the top of the picture below.


And then I sewed it together...

...and it worked! You can see from the picture below that I kept the underarm and shoulder gussets from the original 'Elegant Escape Dress' pattern. I cut these from the navy fabric as I liked the extra flash of navy higher up the dress. I finished the neckline and armholes with bias binding I made from the red fabric.

I needed half a metre of each colour (at AU$7/m each), making a grand total cost of AU$10.50 for my dress. The inspiration dress was the equivalent of AU$1262. Quite a saving!
The verdict: I love it! It is very striking so perhaps not an everyday summer dress. Although I can see myself wearing it a lot with a coat and boots if autumn and winter ever arrive in Perth.

I am up against some very stiff competition in the RTW contest. It is well worth checking out the other gorgeous entries and I would love it if you felt like voting for me when entries close at the end of Feb 2013 :)

If you are interested my last year's Victoria Beckham-inspired entry is here. I ended up coming fifth in 2012!!
 

Monday 10 September 2012

A basic (but useful) top


I've just finished this very plain and simple top, which I'm hoping I might get a couple of wears out of before the hot weather blasts into Perth! This top is a scoop neck, long sleeved style which is curved out slightly at the hips so it is flattering around the tummy area! 

It is a complete copy of this top, which - yes, you guessed it - is by Metalicus. I should really branch out from Metalicus copies and refashions but I just can't help myself lately!


I really liked the shape of this top and the cuffs. I had a lovely piece of fabric from Textile Traders, which was t-shirt weight, but with a cosy, fuzzy side. I used the full metre of the fabric to make the top with only tiny scraps left over - yay! I had to piece the sleeves together at the elbow, but I topstitched the seam so it looks like it's supposed to be like that (hopefully).


I changed the finish on the neckline, from a fold-over binding on the original, to a strip of fabric folded and sewn to the neck edge, stretching the strip slightly while sewing. This sits very nicely and is quick and simple to do. 

I think this is something I will wear and wear in the colder weather as it's cosy, comfortable and goes with everything. Everyone needs basics, right?
 

Thursday 16 August 2012

Restyle Day 16 - a top refashion


Here is a sneak peek of my latest refashion project - deliberately shadowy in this picture to pique your interest! I am quite excited about this. It is a designer knock-off made from two t-shirts.

I have just included this in my Restyle for today as my other items of clothing are not op-shopped, self-made or refashioned today. But this top makes up for it as you will see when I post the tutorial soon :)

Thursday 7 June 2012

Woven ribbon cushion - a tutorial


This tutorial forms part of my
Bedroom makeover series
Click the image for more

On a trip to Target a couple of months ago, I spotted a lovely red cushion with raised, woven ribbon detail. I haven't been able to find a picture of it online, but I kept it in my head and decided to make one to go with my new bedroom decor (more on that in a future post).

The Target version had the ribbons closer together, but I wanted my silver fabric to show through so I spaced the ribbon weave further apart. The fabric came from the sale rack at Textile Traders and the ribbon was from Spotlight. This cushion only cost me about $7 to make, compared to $40 in Target.


Want to make one? Here's how:

You'll need enough fabric for the front and back of the cushion and approximately 9m of ribbon. I used 1cm wide ribbon in silver/grey.

I wanted a rectangular shaped cushion. The standard size for these (in Australia at least) is 30x50cm so I cut my fabric approximately 32x52cm (extra for seam allowance).

Both my measurements (30 and 50) are divisible by five, so I decided to space the ribbons 5cm apart. To begin with, I ironed horizontal folds in my fabric, 5cm apart. This formed the guide for the horizontal ribbons (you could draw lines with fabric chalk instead if it will show up on your fabric).


Next I marked with fabric chalk along my ribbon to indicate where to sew. I started about 4.5cm along the ribbon, then marked the next 2.5cm, then 4cm, then 2.5, 4, 2.5 until I'd marked approximately 75cm of ribbon. Each horizontal line takes about 75cm of ribbon, but don't cut it yet! You can see my markings in blue in the picture below.


Then you can start to sew. Turn on the radio as this takes a while, but it's easy and therapeutic! Lie the ribbon along the first ironed fold with the end of the ribbon at the side of the fabric. Sew along the first marked chalk line, reversing at each end of the stitching to keep it secure. Next is the 2.5cm section. Fold the ribbon halfway between the 2.5cm marks and stitch close to the first line of stitching you've just done (see below if this is confusing).


Don't worry if the stitching goes over the edges of the ribbon or if the folding is not perfect. It won't be noticeable when it's finished. At the end of the row, cut the ribbon flush with the edge of the fabric. Your first line of ribbon should look something like this:


Continue until you've done all the horizontal lines of ribbon. My cushion had five horizontal rows.


Now you are ready for the vertical rows of ribbon. I found it easier to just eyeball these rows, rather than marking the ribbon.

Weave your ribbon in and out of the existing ribbon rows as shown below (under, over, under, over etc.). Your next row will be woven the opposite way (i.e. over, under, over under).


With the ribbon centred between the existing 'sticky-up bits', continue to sew as before creating new sticky-up bits halfway between each existing row.

Sew, sew, sew and sew some more...


...until it's done. Then make up your cushion using your preferred method. I always do it this way.


I love the texture of the ribbon and the way it catches the light.


Woo hoo! This project was featured on:


Thursday 10 May 2012

RTW contest


Only one day left to vote in the Pattern Review 'Ready to Wear' contest. Contestants had to make a garment inspired by a RTW item. This was my entry inspired by a VB dress (more info here). Hop on over and vote for your favourite, there are some gorgeous designs on there!

Voting closes 11 May 2012.

Wednesday 25 April 2012

Victoria Beckham inspired pleated dress


There were several dresses I liked from the 'Victoria' by Victoria Beckham collection which was released in early 2012 (but is no longer on the VB website). I blogged about my favourites here and last month I made this dress, inspired by one of my top picks.

I had been thinking about the pleated dress (above) for a while and when I saw the RTW contest on Pattern Review, I thought I'd have a go at making it and enter my first ever sewing competition!

I bought the fabric for the top at Homecraft Textiles. I spent ages trying to find the spotted fabric and I finally discovered this one under a pile of other rolls on a bottom shelf. Then I chose the off-white fabric to match the background of the spotted fabric. The pleated fabric was an op shop find from ages ago.


The pattern was completely self drafted based on tops I already had. I made a v-neck as I prefer that shape on me. The panel of blue dots was sewn on to the front of the top. The neckline and sleeves were finished with ribbed stretch knit. I have never worked with pleated fabric before and it was a real challenge (I could insert a much stronger word here, but I won't!). I used a rectangular piece of fabric for the skirt, which should have been simple but I must have made the skirt about five times and unpicked it before I got this version, which is still far from perfect. I was initially trying to fold the fabric into its pleats and then sew it, which was next to impossible. In the end I went with a separate skirt and top, rather than a dress. I just couldn't attach the skirt to the top without it looking bulky and messy, even with the addition of elastic, which I sewed in and removed at least twice!


To create the separate skirt and top, I finished the hem of the top with a white ribbed band and that was done. Phew! I added a wide navy ribbed band to create the waistband of the skirt and stretched it as I sewed the 'flattened' pleated fabric to it. When the waistband is unstretched (as shown below right), or only stretched slightly, the pleats hang quite nicely. 

So there we go. Check out my entry on the Pattern Review RTW contest page and vote for your favourite (from 1st May 2012), or why not enter something you have made yourself! The more the merrier.


Ready to Wear (RTW) Contest


Wednesday 7 March 2012

Victoria Beckham-inspired parachute dress


Do you remember a few weeks ago I blogged about some VB dress designs. Well, I was at the annual Homecraft Textiles 50% off sale and I found some fabric that I thought would be good for making a version of this dress (source):


The fabric was a nylony, parachutey type of fabric. I love this type of fabric, although I never really know what to make from it. I liked the two colours together, grey and deep, dusty blue, and I decided to use the grey for the skirt and blue for the top of the dress. The only reason for this was that the grey was thicker fabric and better suited to the skirt. 


I changed the style of the dress to have a lower neckline as I think this suits me better. I also added some little sleeves, which were cut as part of the top.


I made the top based on a t-shirt pattern and just added a bit at the front to accomodate the gathers. From the above picture I think maybe I added too much. I am not pregnant!! The gathers are made by stitching facing to the neckline, threading a ribbon through the front part of the neck facing and stitching in place at the shoulder seams.


The skirt is made with a rectangle of fabric sewn into a cylinder. I attached the skirt to the top and elasticated the lower edge of the top.


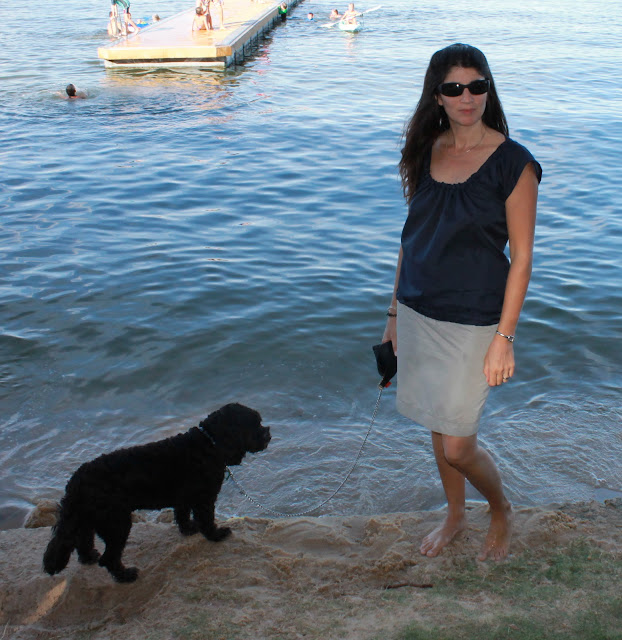
I like that this is such a simple design, which is easy and comfortable to wear. I wore it here at a very casual evening BBQ at the river, but I think it could be dressed up into a smart casual outfit. And the cost? Well, correct me if I'm wrong, but I think it was a bit cheaper than the VB version. Mine cost me $4.

It was a gorgeous evening. I'll leave you with a picture of our view as we ate our picnic, just after seeing a dolphin come right in to shore chasing a fish - bliss!

Tuesday 14 February 2012

Mela Purdie inspired t-shirt and skirt outfit


A couple of weeks ago I was in a local boutique with my Mum while my Dad watched the boys (weird feeling to be in a boutique, I used to live in them pre-kids!) and I saw this gorgeous outfit by designer Mela Purdie. It was a simple t-shirt and skirt styled with a white and silver disc pendant. Simple and perfect. I had to have it, but at $200 a piece that was not gonna happen. I committed it to memory and now, a few hours work and about $5 later, I have one of my very own :)

I chose the exact same colours for my outfit as I'd seen on the mannequin. I couldn't find the items in the same colour to show you, but here is a similar outfit in black (source).


I used Jalie pattern 3132 for the t-shirt. I made the view in brown (below) with cap sleeves. I also altered the hemline give it waterfall sides and widened the pattern slightly at and below the hips. I used a lovely, soft knit fabric to make it that I had found on the $2/metre table at Textile Traders. They had the exact colours I was after. It was meant to be :)


I used my trusty large plastic platter to create the hemline shape on my traced pattern.


 I'd never made a hem this shape before...

 ...but after some trial and error, I decided to fold up a triangle of fabric

 and then fold each side up to create a neat point. The hem was folded once only then stitched with a twin needle.


This is how it ended up.


The skirt is made from the same jersey knit that has been doubled over to give a smooth finish. The waistband is also doubled over and cut a shorter width than the skirt so it's a bit tighter. The waistband and skirt are joined in a single serged seam. The hemline is finished with a twin needle.


Here is the finished outfit. I am so happy with the way it turned out. It really does look like the one I saw in the shop and it cost me about $5. Woo hoo!


LinkWithin

Related Posts Plugin for WordPress, Blogger...