Showing posts with label Toys. Show all posts

Sunday 24 August 2014

Meet Edward Tulane


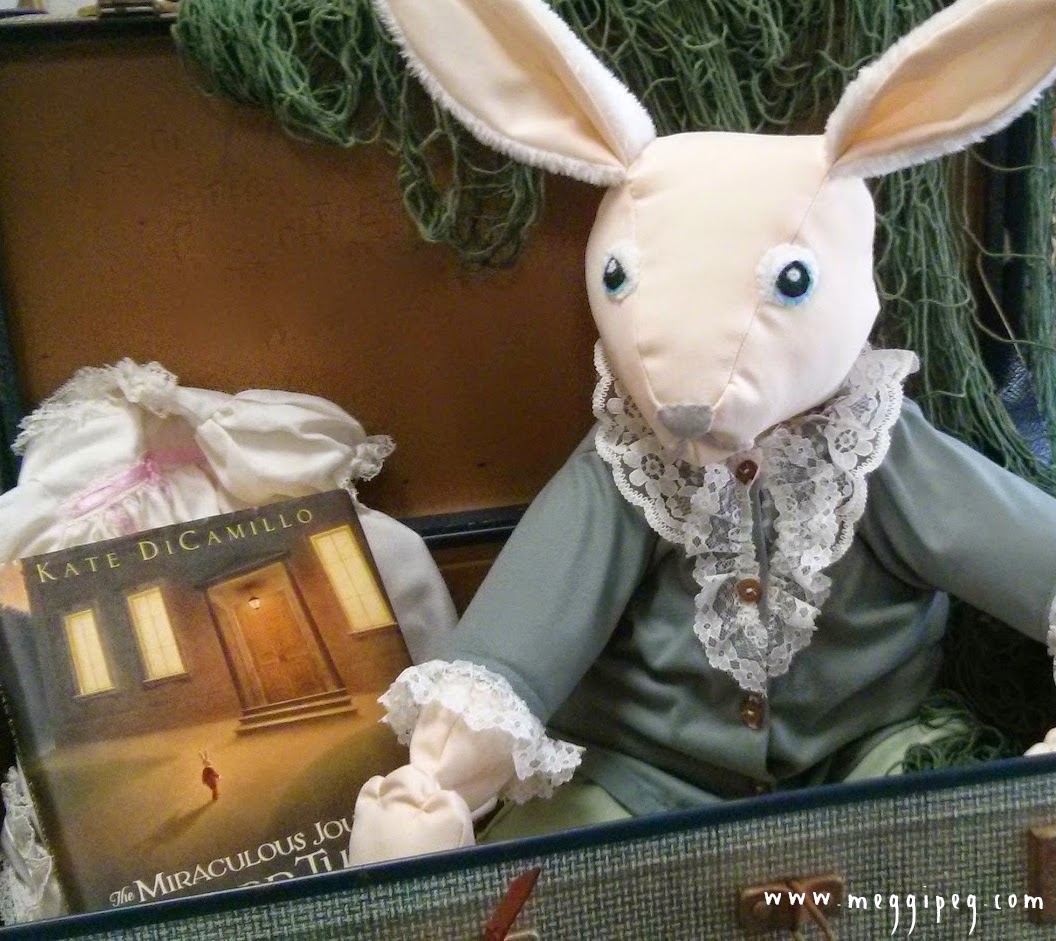
Not long ago, the delightful teacher of my younger son's class came to me with a proposition. She was planning to read 'The Miraculous Journey of Edward Tulane' to the class and wanted a stuffed rabbit to use for associated activities. She had searched everywhere for a rabbit that was distinguished enough to use as Edward, but had not found anything. Well, it seems that word of my sewing addiction has reached the school as the teacher asked me if I could make something that would fit the bill.


I don't make many toys, but creating this adorable rabbit was certainly a project I could enjoy. I googled as many images from the book as I could find. I also found a lady who has posted pictures of her own beautiful Edward Tulane stuffed rabbits. I found a book in the library ('Creative soft toys to sew' by Creative House) with a rabbit pattern that I thought I could modify to look the part. 


I decided to make everything from materials I already had, which was not difficult given the resources in my bursting-at-the-seams sewing room.

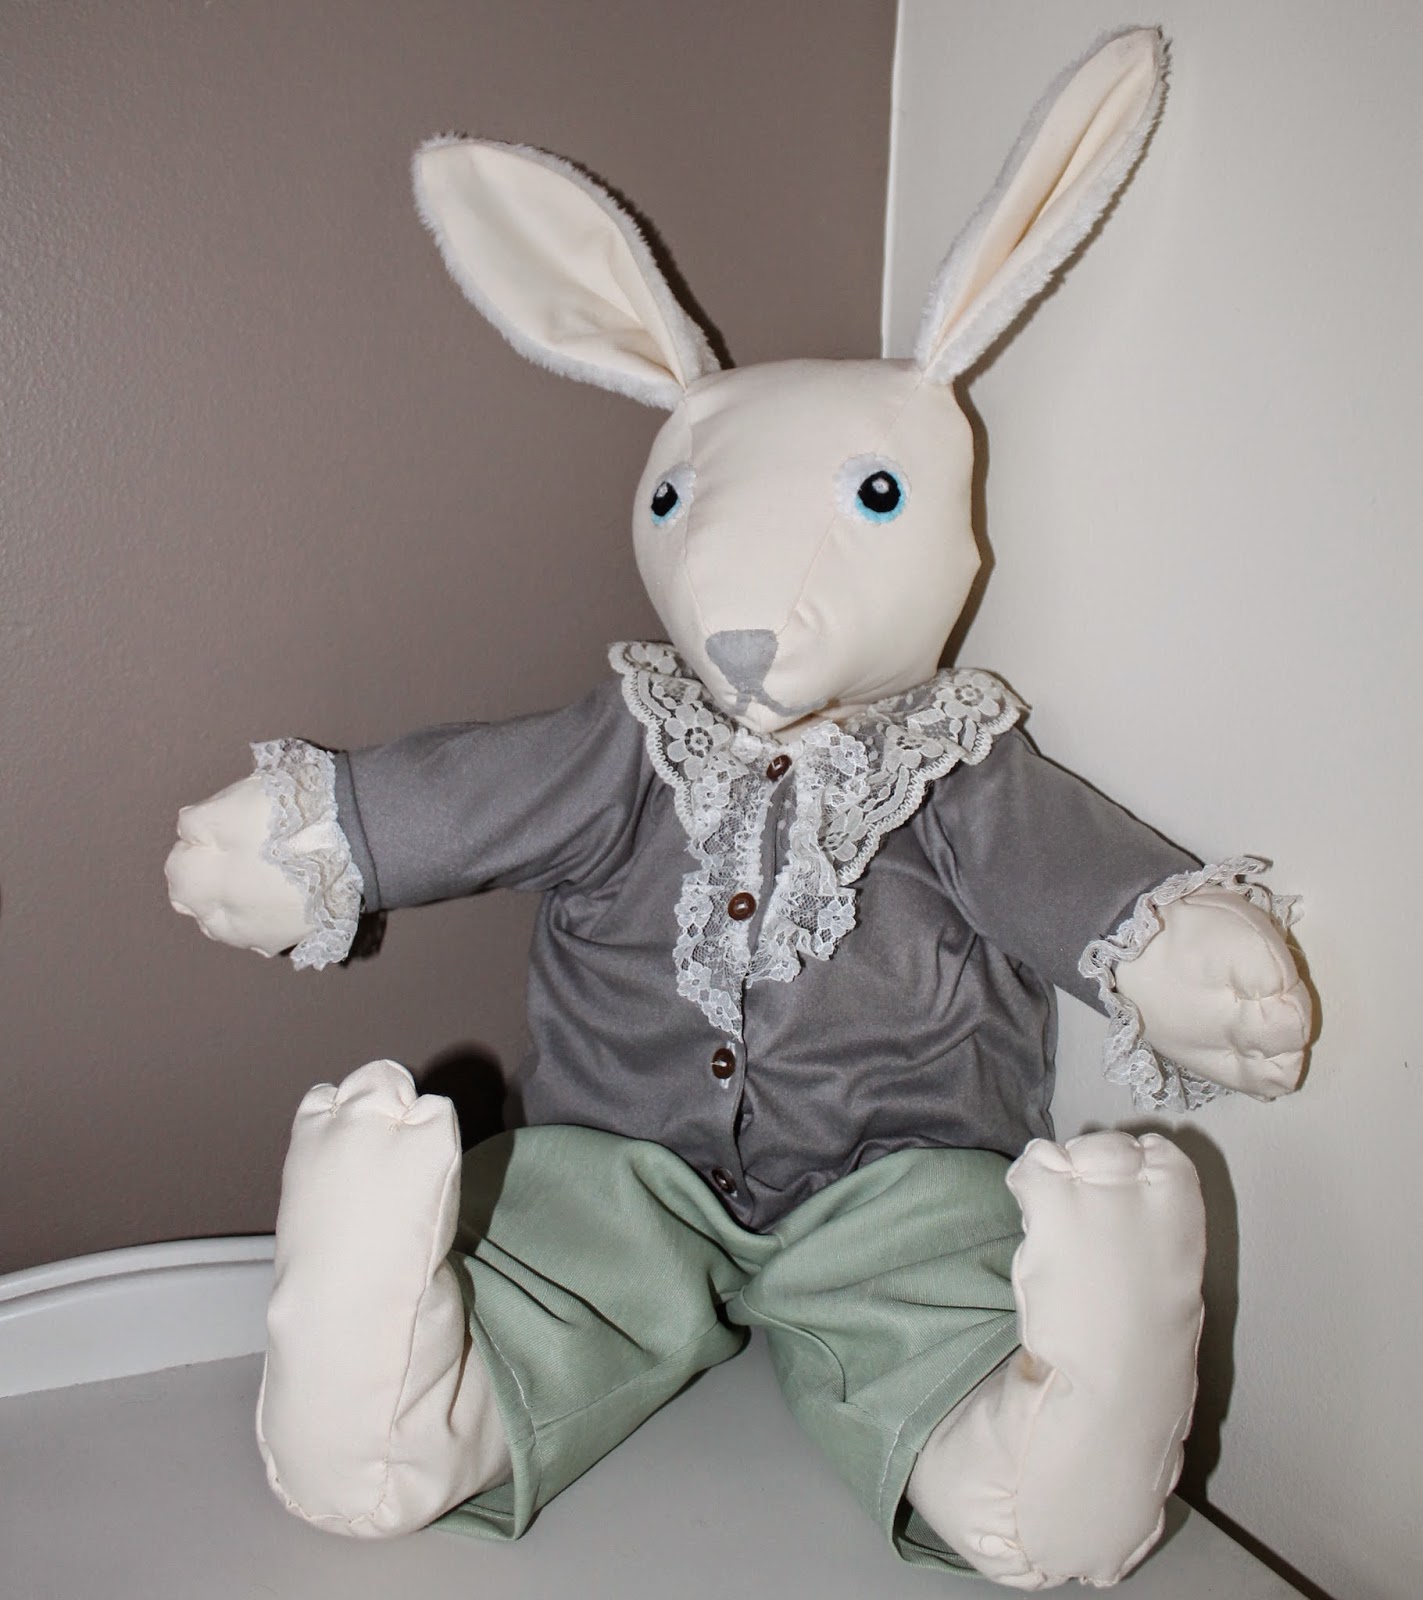
The main body is made from a lovely off-white cotton (op shopped) and the ears are made from scraps of white fur fabric left over from dance costumes. The clothes are also made from scraps. I used felt for the eyes and nose.


After I had made and stuffed the head, I slimmed down Edward's face with hand-stitched darts below the ears. I wanted the ears to stand up as in the book illustrations so inserted copper wire into each one. I used long wire so it also ran through the head and down into the chest area to provide head support.


I layered the parts of the eyes and handstitched each layer together before sewing the eyes to the head. I thought that was safer than trying to embroider the eyes straight on.


The clothes were made using a pattern for baby clothes, which I modified to fit Edward. I tried to make the colours of the clothes and the lace embellishments as authentic to the book illustrations as possible. I also added some hand stitches on the hands and feet to make rabbitty fingers and toes.


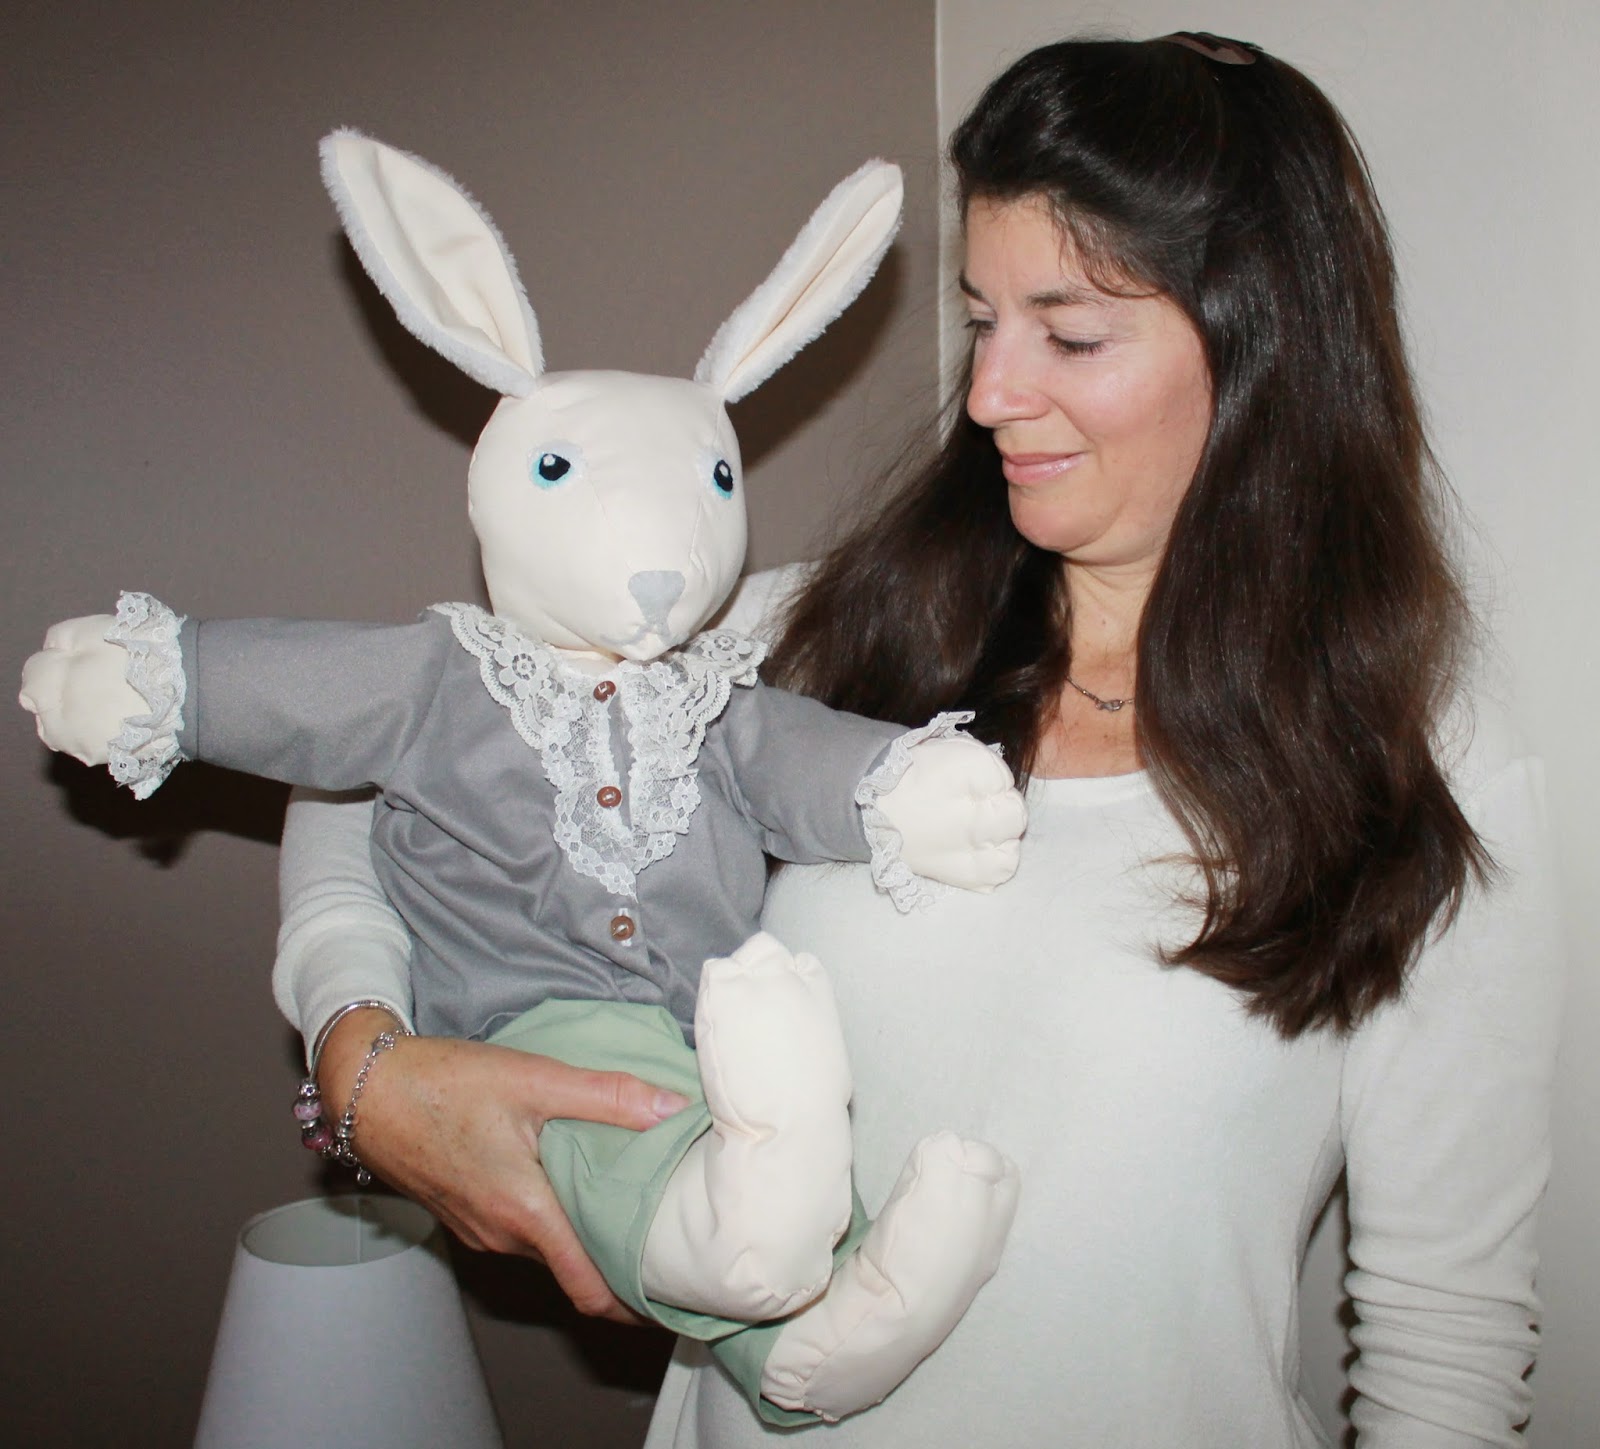
I loved this project and was over the moon with the final result. I think my Edward turned out a lot like the rabbit in the book and, although I am not a soft-toy fan, I was a bit sad to have to let him go!


I took him to JJ's class the day after I finished him. Since then, I have had so many children come up to me and say how much they love Edward. The teacher is reading the book to the class at the moment and the children get to take turns holding Edward during the story. It makes me all glowy every time I think about it. The class also made me a lovely card and the teacher bought me a beautiful scarf to say thank you. Thank YOU Mrs G for all you do for the children and for involving me in this fun project.

Monday 9 July 2012

The Mud Monster - bringing a child's drawing to life


She screamed as she glanced back and saw the terrifying creature rising out of the mud...

I've had my nine year old home sick for the last few days. Desperate to get him away from the TV, I finally convinced him to do some craft. I've seen various blogs posting about making children's drawings come to life in the form of a stuffed toy so we decided to have a go.

I started by getting LJ to draw his design and plan colours etc.


I then gathered my (rather large) stash of scrap fabrics, strings, ribbons, buttons etc. LJ chose the fabrics while I worked out the pattern. He was so particular about the exact colours he wanted, so this took some time. It wasn't difficult to make the pattern. I used a cone shape for the body, a circle gathered into a ball for the head and some brown fleece fused to interfacing for the mud. I drew the arms based on his design. Just remember to add seam allowances. I let LJ do some of the sewing on the machine. Then it was all stuffed and hand stitched together. LJ wasn't keen on hand sewing as it took too long for his liking, so he worked on the details of the design while I did the main construction.


LJ cut out the mud globules, mouth, teeth and debris from felt and fleece (non-fraying fabrics are good). We used a straw covered in grey fabric for the pipe and coloured string for the eyes. All of this was glued on with fabric glue (PVA would also work).


That was it. A very enjoyable couple of hours spent creating a really cool little character. I'm all for getting boys to sew. LJ was very pleased with his efforts. His next question "Mum, can I watch TV now?" Aaaarrgghh!


Saturday 5 May 2012

I forgot the penguin!

In my last post, when I showed the presents I'd made for my sister and her new baby I left one thing out....


...this little stuffed penguin!

I used this pattern and tutorial by the Purl Bee. The fabric was just scraps from my stash. I tried to choose patterns and textures that would be interesting for a baby.


I used circles of felt for the eyes instead of buttons. and I added several different coloured ribbon loops as a tail. Babies love to play with ribbons and tags.


This is a lovely little free pattern and makes such a sweet gift for a baby.

Saturday 24 March 2012

Fun with flashing


'What kind of flashing?' I hear you ask, possibly with raised eyebrows. Well, not that kind, this was aluminium flashing - and much more fun!

I first had the idea for this when I saw this post for a DIY chic metal belt (Geneva's blog is gorgeous and well worth a read by the way). I bought a roll of aluminium flashing from Bunnings for about $14. The boys fell on it when I brought it home and immediately started cutting and hammering. Of course, being boys, they had to make armour! They got pretty creative though and it was so much fun to work with this stuff - it cuts with scissors, bends with fingers or pliers and is easily hammered into any shape. Make sure children are supervised with tools and that all sharp edges are turned in and hammered down.


After much industrious work, here are some of the things we ended up with...


Belt and arm cuffs made by my 8 year old


with double sword carrier and dagger holders!


And this incredible helmet designed by my six year-old.


Good, cheap, creative entertainment - the best kind :) I'd love to see what you made if you try this. I wonder what gorgeous things girls might create with this lovely silver.

Tuesday 10 January 2012

Spike the sock monster


Meet Spike.

He is made from an old sock and is much loved.


Jamie chose him from this gorgeous book 'Stray Sock Sewing' by Dan Ta that I borrowed from the library. It has instructions to make many adorable sock creatures. Unfortunately Jamie chose one of the ones without instructions, so I had to wing it.

Spike actually turned out quite a lot like the picture (believe it or not!!) and Jamie (aged 6), who has never been interested in soft toys in his life, decided that Spike was the best thing ever. They very often cuddle up together to go to sleep with Truffle the dog.


When he's not sleeping, Spike likes to hang out in the herb garden.


I think he likes the coriander best :)

LinkWithin

Related Posts Plugin for WordPress, Blogger...