Showing posts with label Jalie. Show all posts

Monday 27 August 2012

Restyle Day 27


Mmm, more loquats!

Today I'm wearing two things you've seen before: my Jalie jeans (pattern 2908), made from op-shopped fabric and costing less than $5; and my Jalie jacket (pattern 2795), made from op-shopped fabric and costing around $8. In both cases, the zips cost as much or more than the fabric! I'm wearing a brown Metalicus top underneath.

Oh yes, and I forgot to mention my opinion on 'The Vagina Monologues', which I saw on Saturday evening. Well, what can I say?! I went knowing nothing about it, but really, it was exactly as the name suggests - various monologues about vaginas. Some were touching (in an emotional sense only!), some confronting, some just interesting. I was completely entertained throughout the performance. I don't know how the six female actors managed to get on stage and say what they said. I also don't know that it was entirely my cup of tea, but I'm very pleased I went as it was thought provoking and the performance was very well done. All in all, a very pleasant evening :)


Monday 20 August 2012

Skinny Jalie jeans with ankle zips


This is my fourth time making Jalie jeans from pattern 2908.  My other versions include: skinny cargos, denim skinnies, skinnies with side pocket zips and now these, er, skinnies. Ok, I'm not very imaginative re. the leg shape, but I do try to give a new spin on the jeans each time. This time, I've added zips to the side seams at the ankles. These zips are not necessary for getting the jeans on and off, but just to add interest.


I've worked out my size seems to be an 'S', blended to a 'U' above the hip. It is pretty easy to blend the pattern pieces as they are being traced because all the lines are there, you just need to switch lines and smooth the curve between sizes. I also changed the bootcut leg to a skinny as I was tracing the pattern.

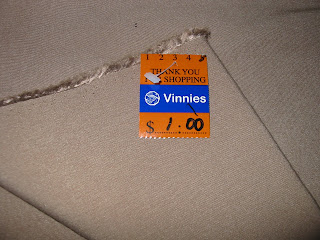
I made the jeans with a fairly lightweight stretch fabric that I found at the op shop for $1. The zips cost more than the fabric!! I'm trying to use up some of my op-shopped fabric stash at the moment.


I made the higher waisted version of the jeans.


To insert the zips I used the following method:

At the bottom of the leg, I left the seam open the length of the zip (I used a 15cm zip). I finished off the raw edges with a serger. I pressed the seam open and snipped to the fold at the top of where the zip would go.


This picture shows the right side of the fabric. This is the hole created for the zip. The top only folds over a small amount.


I pinned the zip in place,


and sewed all around the sides and end of the zip using the zipper foot.


Voila. Next I hemmed the jeans. I folded the ends of the zip under and caught them in the hem stitching to give a neat finish.


The underside of the zip before hemming.


The finished zip and hem.


I am very pleased with the fit of these. I'm wearing them here with an op-shopped top and some Bali sandals. Would you believe I got a wolf whistle on the way home after taking these photos?! It's been a few years since that happened. Thumbs up for the Jalies!

Restyle Day 20


Day 20 of the Restyle Challenge. A glorious day warm enough for short sleeves and sandals. Truffle had been happily truffling in some white sand while I was setting up the camera. If he can stick his nose in something, he always will! Now he has his eye on a beautiful pink and grey galah in a nearby tree. The birdlife in Perth is so beautiful (me)/so great for chasing (Truff).
  • Red French Connection blouse - op shop, $5.
  • Red Bellabwear cami (worn underneath), my own.
  • Beige latte jeans - Jalie pattern 2908, made by me using op shop fabric, $5.
  • Red sandals - Bali street market.
I have just finished making these new jeans and I am very pleased with them. I will have more pictures and info in a blog post near you very soon.


Saturday 18 August 2012

Restyle Day 18


On the eighteenth day of the Restyle Challenge, we are having glorious, warm, 23C weather. We popped down to the river so Truffle could have a swim.

Outfit details:

  • Jalie jacket, pattern 2795 - made by me using op-shopped fabric, $9.
  • Trenery cropped pants - op-shopped a couple of weeks ago, $5.
  • Camilla and Marc t-shirt - Dunsborough op shop, $4.
  • Ipanema sandals, my own.
Watch out ducks! 

Friday 17 August 2012

Restyle Day 17


Details of my outfit for Day 17 of the Restyle Challenge:

  • Spicysugar black and grey cardi - op shopped a couple of years ago, approx $4.
  • Black Bellabwear top - my own.
  • Grey jeans - Jalie jeans made in a skinny, cargo style by me. More info here.
  • Crocs shoes - my own.
Today when I snapped this photo, a man came running over to me. He was concerned that he had been included in my picture! I showed him this photo, in which you could see him as a speck in the distance (I've cropped him out now but you can see him below). He said that he was embarrassed about having his picture taken and would prefer not to be in the photo. I said I'd cut him out of it and he agreed to let me keep it, before hurrying off again. I wondered afterwards if perhaps he was wanted by the police or something. Have you seen this man stalking (and accidentally photobombing) fashion bloggers???


Tuesday 7 August 2012

Restyle Day 7 and week 1 roundup


 Well, I'm one week into the Restyle challenge. Today I'm wearing my new jacket, made completely from op shop fabrics! The cost of the jacket was less than $5 for the fabric and $4 for the zip. Not bad for $9. It was made using Jalie pattern 2795 and you can read more about how I made it here.


Day 7 of the Restyle sees me wearing:

  • Jalie jacket made by me out of fabrics from the op shop, $9.
  • Laura Ashley pants - op shop purchase refashioned into slim-leg style by me, $5.
  • Long sleeved t-shirt, Bellabwear - purchased from Ozsale.
  • Canvas boots - purchased from Big W.
So here's my Week 1 roundup. Lots of DIY and refashions and plenty of op shop goodies...


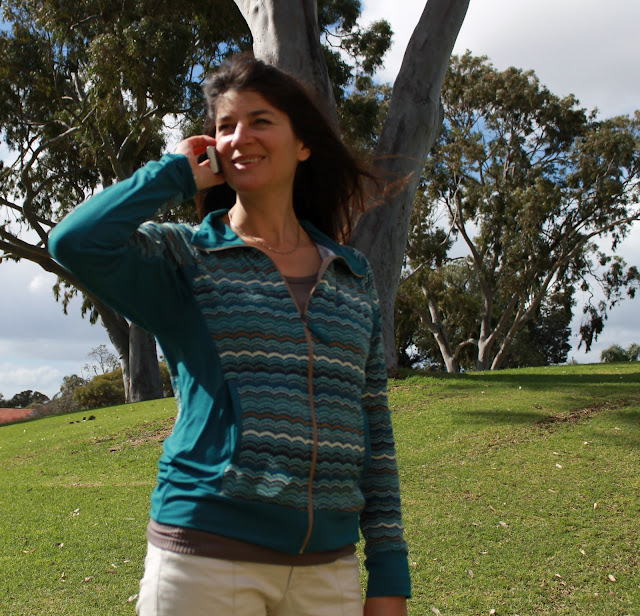
Teal we meet again: Jalie jacket pattern 2795


I've bee sewing again. This time it's another Jalie jacket, pattern 2795. I have previously made a similar Jalie jacket using pattern 2679, but it was time to try this one as I've had the pattern for a while now and winter is early over.


The pattern has a hooded ad on-hooded version. I decided at the last minute to leave off the hood, even though I had it cut out and sewn together. I think I'd have put it on if my hair was shorter, but my hair just ends up covering the hood, which then creates a strange hunchback-like bump. Well, that's what it looked like to me as I peered round in the mirror at my pinned-on hood. So I left it off.


I was very happy with this pattern. I chose a size U, which was 3cm less than my measurement at the bust. The fit is just right.

As part of my Restyle challenge, where I try to wear op-shopped items every day in August, I chose fabric that had been purchased from the op shop. I've had both these fabrics for quite some time and I can't remember what they cost me, probably around $3 for a huge piece of the patterned fabric and $2 for the teal. Both are two-way stretch, t-shirt weight fabrics and, although the Jalie pattern is meant for thicker fabric, such as fleece, I like the practicality of a lighter jacket as we move towards spring. The pattern worked well in this fabric, although the collar is a bit floppy.


Although I had plenty of the patterned fabric to make this jacket, I thought this might be a bit much, so I broke the pattern up with the teal fabric. I was very pleased when I went through my stash and found how well these two went together. The main body of the jacket is patterned and the sides, undersides of the sleeves, collar, cuffs, waistband and pockets are plain. I'm really pleased how this turned out.


I've made several Jalie patterns now and, like the others, this one was clear and straightforward to make. There are a LOT of pattern pieces though and I found I'd forgotten to cut out a couple as they were labelled 'cut 2 on fold' and I'd only cut one set the first time around. Luckily I had enough leftover fabric. Using the patterned fabric was also a bit challenging, especially as it was quite stretchy. I was careful to cut the pieces out so the pattern matched, but I ended up inserting the zip three times before I was satisfied that the pattern lined up.


Overall I'm really pleased with this jacket. It is just warm enough to wear today (windy, 17C) with a long sleeved t-shirt underneath. The stretchy jersey fabric also means it's super comfortable. The pattern combination worked out well and I'm pleased that it's very one-of-a-kind.


This last picture shows some of the jacket detailing in the sleeves and pockets. I also added a scrap of teal fabric on to a small plumber's washer and attached it to the zip pull for a extra bit of detail.


A very enjoyable and successful project. Thanks for reading :)

Monday 21 May 2012

Jalie jeans with attitude


I got busy over the weekend and made myself a new pair of Jalie jeans (Jalie 2908). I have made variations of these jeans before as skinny cargos and skinny denims. I like the skinny style at the moment so I stayed with that for this latest pair. However, to add a bit of interest, I inserted zip detailing and horizontal seams above the knee. My inspiration was this pair of jeans from Country Road.
I used red stretch denim for the jeans, which I got on sale for $5/metre at Homecraft Textiles. So these jeans cost me just over $10. I blended a size S Jalie jeans to a size W above the hip. In hindsight this was probably too big as the denim is pretty stretchy and is not fitting quite as smoothly as I would like.


I added a centimetre or so to the length of the front and just folded and stitched to make the seam above the knee. Then I assembled the jeans as usual except that I only finished the inside leg seam below the horizontal knee seams, leaving the crotch seam open. Next I finished the outside leg seams and inserted the zips before finishing the crotch seam. This just made it easier to sew the zips.  I inserted the zips according to this very simple method by 'A lemon squeezy home'.


I put two zips on the right side and one on the left. At the back of the zips I sewed a piece of fabric the same size as the zip facing to make a kind of pocket and to stop the zip poking and being uncomfortable. The inside of the zips looks like this (the checked fabric is the front pocket lining.


Apart from being slightly too big, I'm pretty chuffed with these. Those zips really give me the attitude that I'm lacking in these photos, right??

LinkWithin

Related Posts Plugin for WordPress, Blogger...