Showing posts with label Megan Nielsen. Show all posts

Sunday 22 November 2015

Megan Nielsen Mini Tania Culottes


Living in a house full of boys, I don't get many chances to sew girly clothes. However, I do have two nieces, so when Megan Nielsen was looking for pattern testers for her new girls collection, I jumped at the chance.


These are the Mini Tania Culottes - little shorts that look like skirts. Girly and practical, the perfect combination.


The Mini Tania pattern comes in three lengths, short, above the knee and below the knee. I made the shortest length and I think it's just right, cute without being too short.


I have made Megan Nielsen patterns before for myself and have always been impressed. The instructions are very clear and the patterns are well drafted and carefully thought out. The children's patterns are made to the same high standard. These culottes were super easy to make and the instructions gave enough information for a beginner to achieve a professional result.


I chose the sizes based on the girls' measurements and they were spot on for their ages. The fit is perfect.


I made both these pairs from white cotton calico. The smallest pair was embellished with circles of calico that I had sprayed with Tumble Dye, cut out then sewn on to the culottes. The Tumble Dyes were bought from Dharma Trading.


The blue pair were shibori dyed in navy blue dye that had been used a few times for other things, so it gave a pale denim colour. The circles were produced by stitching, a method I found in my book 'The Modern Natural Dyer' by Kristine Vejar. I love this book as a very practical introduction to natural dyeing.


The front and back of the garment was pinned together and stitched as one piece to save on sewing. I drew circles with disappearing ink and pinned the two layers together.


I then stitched around each circle, with the stitches extending about 1cm inside the circle. Once complete, the thread was pulled tight and knotted ready for dyeing.


I was really pleased with the effect this produced.


The girls loved their culottes and have worn them a lot since they were made a couple of months ago.


 They also enjoyed the photoshoot!


Such little cuties.


I've got lots more girly sewing planned for Christmas prezzies. Hello Mini Briar tee and Mini Virginia leggings!

Wednesday 24 June 2015

Boucle sweater knit - what a great fabric discovery!


While places in the world with seemingly endless fabric choices (Hello America) have probably been sewing with this for ages, it's a new discovery for me. And I love it! It is boucle sweater knit from 'Fashion Fabrics Club', which I found while choosing my prize for the Pattern Review jeans contest.

The fabric is the weight of fleece and is slightly fluffy inside like fleece. The outside is textured a bit like towelling and it's soft and cosy and fabulous. I've made a jumper and a jacket with my, almost 2 yard, length.

Image source
For the jumper, my inspiration was this picture (above).


I used the Briar t-shirt pattern as the basis for this. I lengthened the front and back and lowered the front hemline curve. I made the neckline higher, drafted long sleeves and added cuffs and a hemline band in black ponte.


Simple to make and cosy to wear.


With the remainder of my fabric I made a jacket using my old favourite Jalie 2795. I used black ponte again for contrast on the shoulder pieces, collar, cuffs and hip band.


I have made this pattern up many, many times. It's a great pattern but, in some of my versions (adult and child versions), the jacket was a bit short. 

Jalie 2795
This time I added 5cm to the length of the jacket. I left the pocket openings where they were so I have lovely, deep pockets in this jacket.


I also added some piping for a bit more interest. It is made from a knit remnant from Potter's Textiles and is just a folded strip of fabric, not real piping. I'm not sure if I love the piping, but it's ok. It's a bit hard to see but I doubled the cuff length. I can fold the cuffs down to the tops of my fingers on cold days.


I bought a longer zip so it would fit the new jacket length. This one was from Spotlight.


You can see the boucle fabric quite well in this picture, although it doesn't really do it justice. Oh yes, I also did a bit of quilting on the shoulder panel. 


Jalie patterns seem to have lots of little tricks for getting a great finish on garments. These pockets, for example, are so easy to make with the excellent instructions provided.


This is just the best jacket for wearing inside and out in Perth's cooler weather, where the houses are often colder inside than outside. Heating, what heating?


I've had this finished for a couple of weeks and have been wearing it non-stop. I'll certainly be looking out for more of this fabric locally in the future. I hope I find some!


Monday 8 September 2014

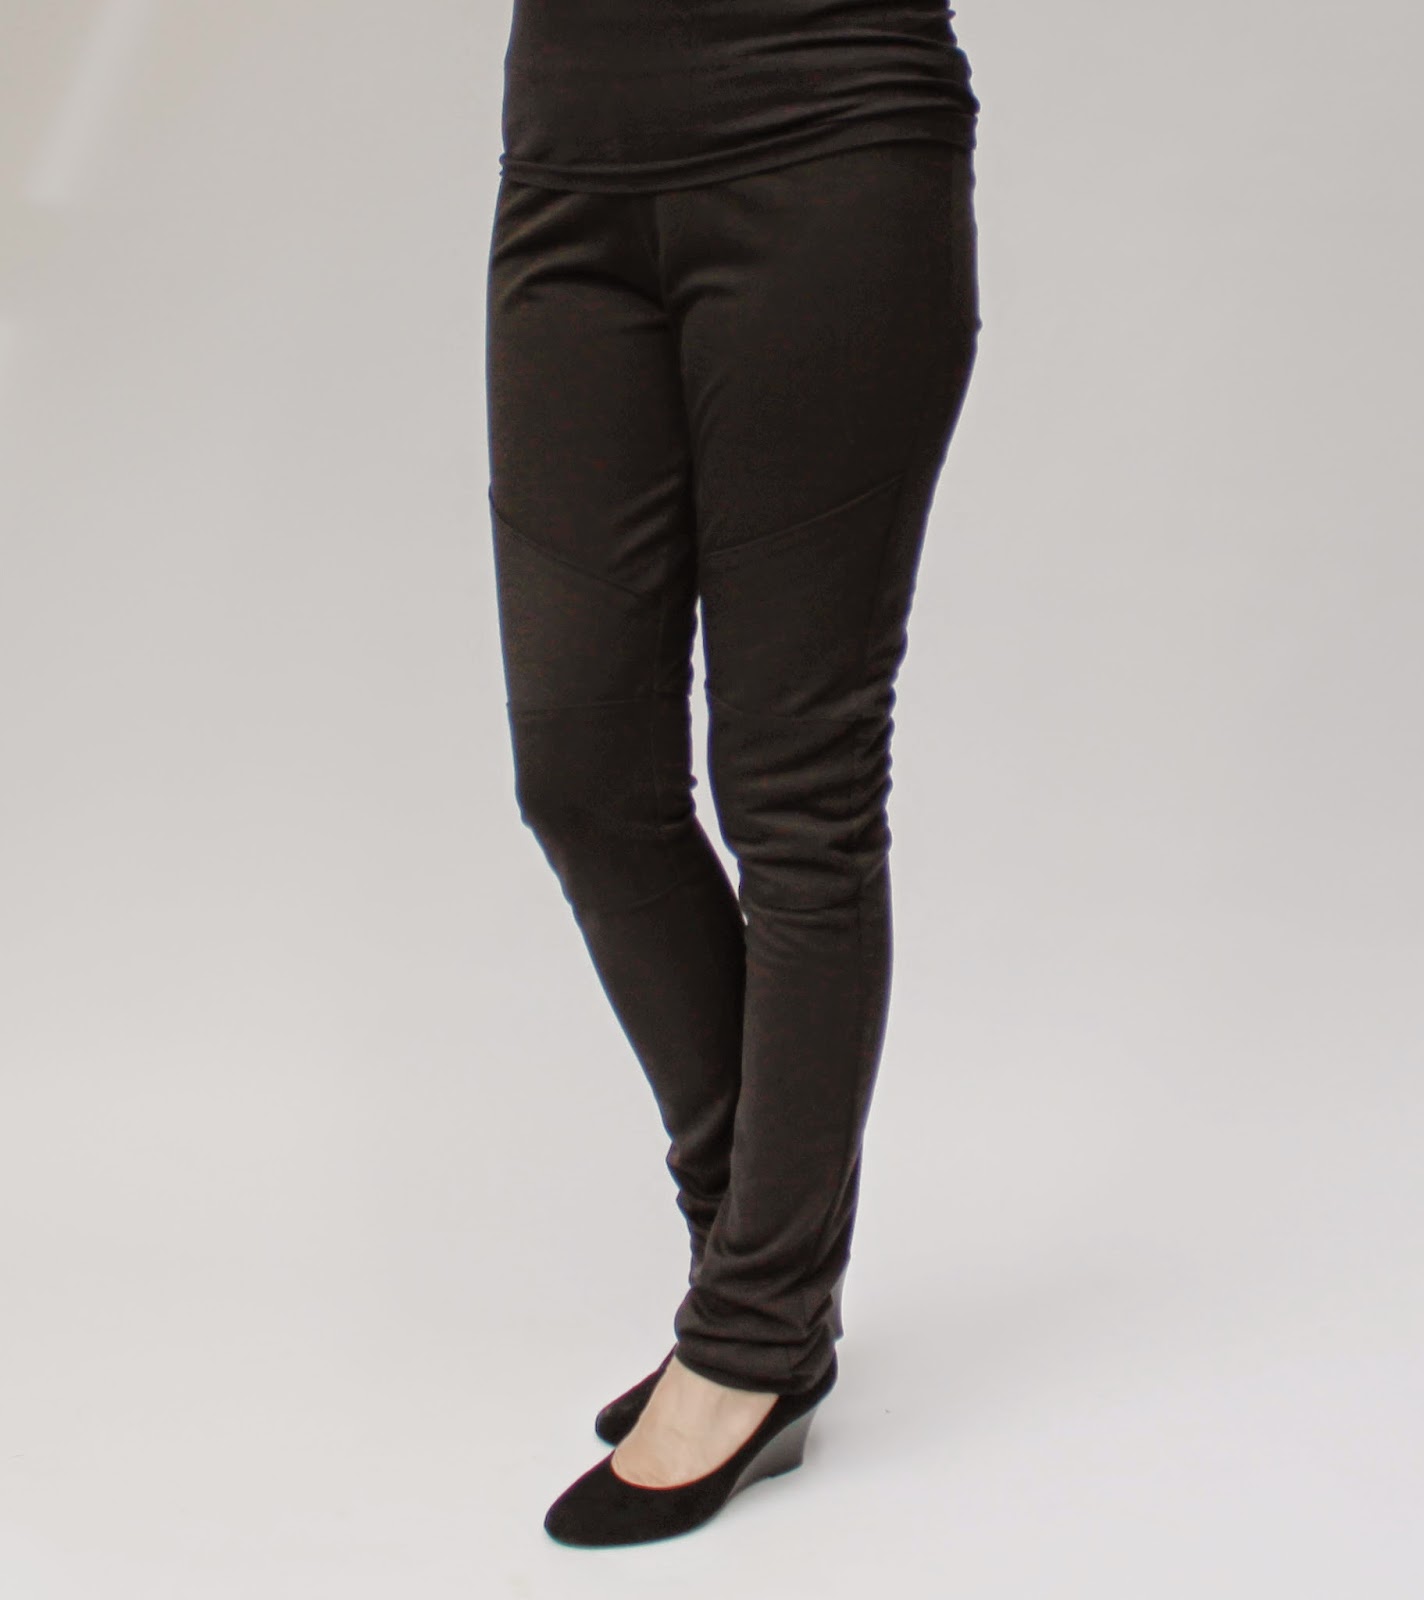
Biker-style ponte pants tutorial with free pattern pieces


So, you saw my ponte pants and want to make some of your own?

Let's do it!

Supplies:
You will need approximately 1 metre of ponte fabric, a leggings pattern* and a printout of my additional pattern pieces for the quilting and knee detail (download free here).

*I used the Megan Nielsen Virginia leggings pattern and modified it as described below. You can use your own leggings pattern or make one by tracing a pair of leggings (remember to add seam allowances).

Method:

The Virginia leggings pattern has no side seams. You need to create some by folding the pattern in half lengthwise (see below) so the two crotch curves match up as closely as possible. Open out again and trace separate front and back pieces using the fold line as the new side seam. Don't cut it out yet. Next you need to add at least 1.5cm all the way down each of the long leg seams (inside and outside leg). This is because ponte knit doesn't have the same amount of stretch as leggings fabric. Larger sizes may need to add more leg width. 

Check your printed knee and quilted pieces against your leggings pattern. Add width if necessary to match your leggings width. 


Cut out all your pattern pieces, including the printed ponte pants pieces, from ponte fabric that has been folded with selvedges together. Take note of grainlines and direction of greatest stretch.


With the two front pieces right side together sew the crotch seam using an overlocker, zig zag or other stretch stitch. Repeat for the two back pieces.


Mark the placement of the quilted piece on your front leggings pieces. Mine is marked in white chalk 27cm from the top of the side seam. Adjust yours as necessary depending on your size. Hold them up against your legs to check placement.


Fold over the top 1cm of the quilting piece and place it on the leggings front piece level with the chalk mark you just made. Pin in place.


Topstitch along the top edge of the quilting piece. I chose to use a straight stitch and stretch the fabric as I sewed so the resulting seam has some stretch. You could used a triple stretch stitch instead but I find it to be less neat than a straight stitch. You can see the seam being stretched as it is sewn below.


Using your sewing foot as a guide, stitch quilting lines through the two fabric layers all the way down the quilting piece. Remember to stretch as you sew. I moved my needle to the right to get stitching lines approximately 1cm apart.


This is the finished quilting. Don't worry if the sides are a bit uneven.


Fold the edges of the knee pieces over by 1cm and place them so they overlap the quilting pieces by 1cm. Pin in place.


Topstitch along the top and bottom edges of the knee piece, stretching as you sew.


If you fancy pockets, add them to the back leggings pieces now. I used the pockets and placement from my Jamie jeans pattern and topstitched them in place. If you don't have a jeans pattern, use a pair of jeans as a guide.


 Trim any excess fabric from the edges of your quilted and knee pieces then sew your leggings together with an overlocker or stretch stitch. I like to sew the inside leg seam first, matching the crotch seams, then the outside leg seams. Add the waistband, hem the lower edge and you're done.


Hooray. Ponte pants!


Sunday 7 September 2014

Ponte pants and another Briar t-shirt


Ponte pants. Ponte pants, ponte pants!


With quilting and knee patches.

Up until a week ago I didn't even know I needed these and now I can't get enough of them.


I liked them so much, I made another pair in black (a bit looser fitting). 


I've lightened these pictures to show the detail.


So comfortable.


And then my sister saw them and requested a pair....with back pockets.


So, here's what happened. I was chatting with my sister and she mentioned that she'd seen someone wearing ponte pants and how great they were and how she'd asked where this person had bought them from and this person said she'd bought them three years ago and they were no longer available. She chatted on a bit more but I wasn't really listening. My mind latched on to the words 'ponte pants' and careered off imagining what such things might look like and, more importantly, how I could make some. I knew immediately that mine would have a slight biker look. When I got home I googled some images and found my inspiration:

My inspiration was this ebay listing
I decided to use the Megan Nielsen Virginia leggings pattern as the basis for these and draw up some pattern pieces for the quilted area and knee patches. I created a side seam (this leggings pattern doesn't have a side seam) and widened the legs a bit to account for the limited stretch of the ponte.

And THEN, I drew up these pattern pieces all proper like so I could make a tutorial and include a download so anyone who also feels that they must have ponte pants can have them tooooo!

But you will have to wait until tomorrow for the tutorial and download. Also, the download will only be my quilted piece and knee piece. The Virginia leggings pattern is copyright, but you can get your own from here or use a different leggings pattern or even trace some of your own leggings and make your own pattern. 

So let's get that leggings pattern ready and tomorrow we'll make some ponte pants!

Oh yeah, and I made this t-shirt with the Megan Nielsen Briar pattern. Stretchy at the front and sleeves, woven at the back with a pleat for movement (described here).


 Oh and one more very exciting thing. Burdastyle recently asked for nominations so they could compile a list of the 50 best bloggers for sewing enthusiasts. AND I MADE THE LIST!!!! I can't believe it. Thank you so very, very, very much to whoever liked my blog enough to nominate me. I'm just happy that anyone wants to read about what I've made. Burdastyle now wants people to vote for their favourite blogs from the Top 50. There are some really great blogs on the list, so it's worth a look.

Until tomorrow xxx

LinkWithin

Related Posts Plugin for WordPress, Blogger...