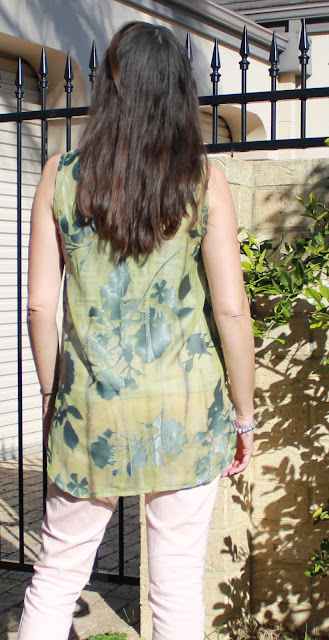
In a recent Restyle post, I wore this asymmetrical top, which I made from a sheer, green fabric with a grey, satiny, floral print. The fabric was quite an investment, costing me all of...
This project was inspired by a top I'd seen by Sass and Bide and also a tutorial on 'Cotton and Curls'.
I wanted the shape of the Sass and Bide top, but decided to eliminate the front pleat as it wouldn't show up well on printed fabric. I dug out this ancient camisole pattern that I last made about, gosh, about...20 years ago...at least! I never throw anything away. You could use a tank or t-shirt pattern or draw your own using an existing top.
 |
| Sass and Bide 'The Decider tank', $290 |
I wanted the shape of the Sass and Bide top, but decided to eliminate the front pleat as it wouldn't show up well on printed fabric. I dug out this ancient camisole pattern that I last made about, gosh, about...20 years ago...at least! I never throw anything away. You could use a tank or t-shirt pattern or draw your own using an existing top.
I left quite a bit of extra fabric at the bottom when I cut out the top, so I had plenty to play with when working out the hemline and the length I wanted. I also left out the side slits and just curved the side seam outwards towards the hem.
I made up the top, leaving the hem long and untouched for now. The neck and arm holes were finished with bias binding, rather than the facings included in the pattern.
Then I drew a curve on some paper for the front hemline, which curves up at the sides and is straight along the middle. I measured down from the neckline to get the front length right and even on both sides. This is standard A4 size paper to give you an idea of scale.
I cut along the curve from '1' (top of curve) to '2' (side seam), flipped the paper and cut the curve on the other side of the front. Then cut a horizontal straight line between the top of both curves.
Then, from the same point on the side seam, I used the same paper pattern to draw and cut the back curves.
Then I hemmed around the curve with a narrow hem.
This was the finished top...the first time. I decided that this version was too long, so I unpicked the hem, cut a few centimetres off all around and re-sewed it.
Now it looks like this:
I still don't know that I'm completely happy with the length, but it was simple to make and is fun to wear. You can't go wrong for $2, especially when my inspiration top cost $290!! I think I'll probably throw this top on quite often once the weather really warms up.
Happy sewing,


4 comments:
This is really, really beautiful! I'm not much of a sewer but I think I might learn just to make this!
You've made my day with that comment - thank you :)
I've been looking for a pattern for a budget piece of silk I have and this will do very nicely Thank you!
I love your choice of fabric, it really suits you.. Just fabulous. WOW, I have been looking for something simple like this for myself. Thank you for the tut!
P.s I am also in Perth, what a lovely city we have xx
Post a Comment