 Many of you have probably heard the buzz about the little French jacket (LFJ) sewalong with Thewallinna and A Challenging Sew. I have admired these jackets over the years as they popped up on various blogs along with 70+ hour estimates of the time taken to make each one. 'Ha!' I scoffed. 'Surely it doesn't take anything like that amount of time'. So when I saw the sewalong I signed up pronto.
I had bought a Patrones magazine (Patrones Extra Dos Piezas, No. 24) earlier this year containing several drool-worthy LFJ patterns. I eventually chose this one. It has a matching skirt, which I may also make in the time left over from the 70 hours!
Many of you have probably heard the buzz about the little French jacket (LFJ) sewalong with Thewallinna and A Challenging Sew. I have admired these jackets over the years as they popped up on various blogs along with 70+ hour estimates of the time taken to make each one. 'Ha!' I scoffed. 'Surely it doesn't take anything like that amount of time'. So when I saw the sewalong I signed up pronto.
I had bought a Patrones magazine (Patrones Extra Dos Piezas, No. 24) earlier this year containing several drool-worthy LFJ patterns. I eventually chose this one. It has a matching skirt, which I may also make in the time left over from the 70 hours!
It's just as well I'm doing the sewalong as all the instructions are in Spanish, which I don't speak, although I am compiling a handy list of Spanish sewing terms. I've stuck it up above my sewing machine to study at my leisure!
First step was a muslin. I traced the pattern in size 42 (note: the sizing is different to Burda, in which I am 38) and used carbon paper and a tracing wheel to transfer the markings, stitching lines, grainlines etc. to my muslin. Would you believe I actually had some old sheets of carbon paper from my typewriter days? Well, if you knew me you probably would believe it! Everyone else is using newfangled sewing tracing paper in large sheets of fabulous colours. Pah!
Here is an early fitting of my muslin before I made a few additional tweaks. I didn't sew the back collar piece on the muslin. Bit of a sneaky time saver there!
The fit at the front was not too bad.
The back needed a bit more length and flare in the peplum and some fitting in the lower back. Once that was done, I drew all the new stitching lines with red and blue marker pens and unpicked all the seams (below right). Next, I had to cut all the seam allowances off using the red and blue guide lines (below left).
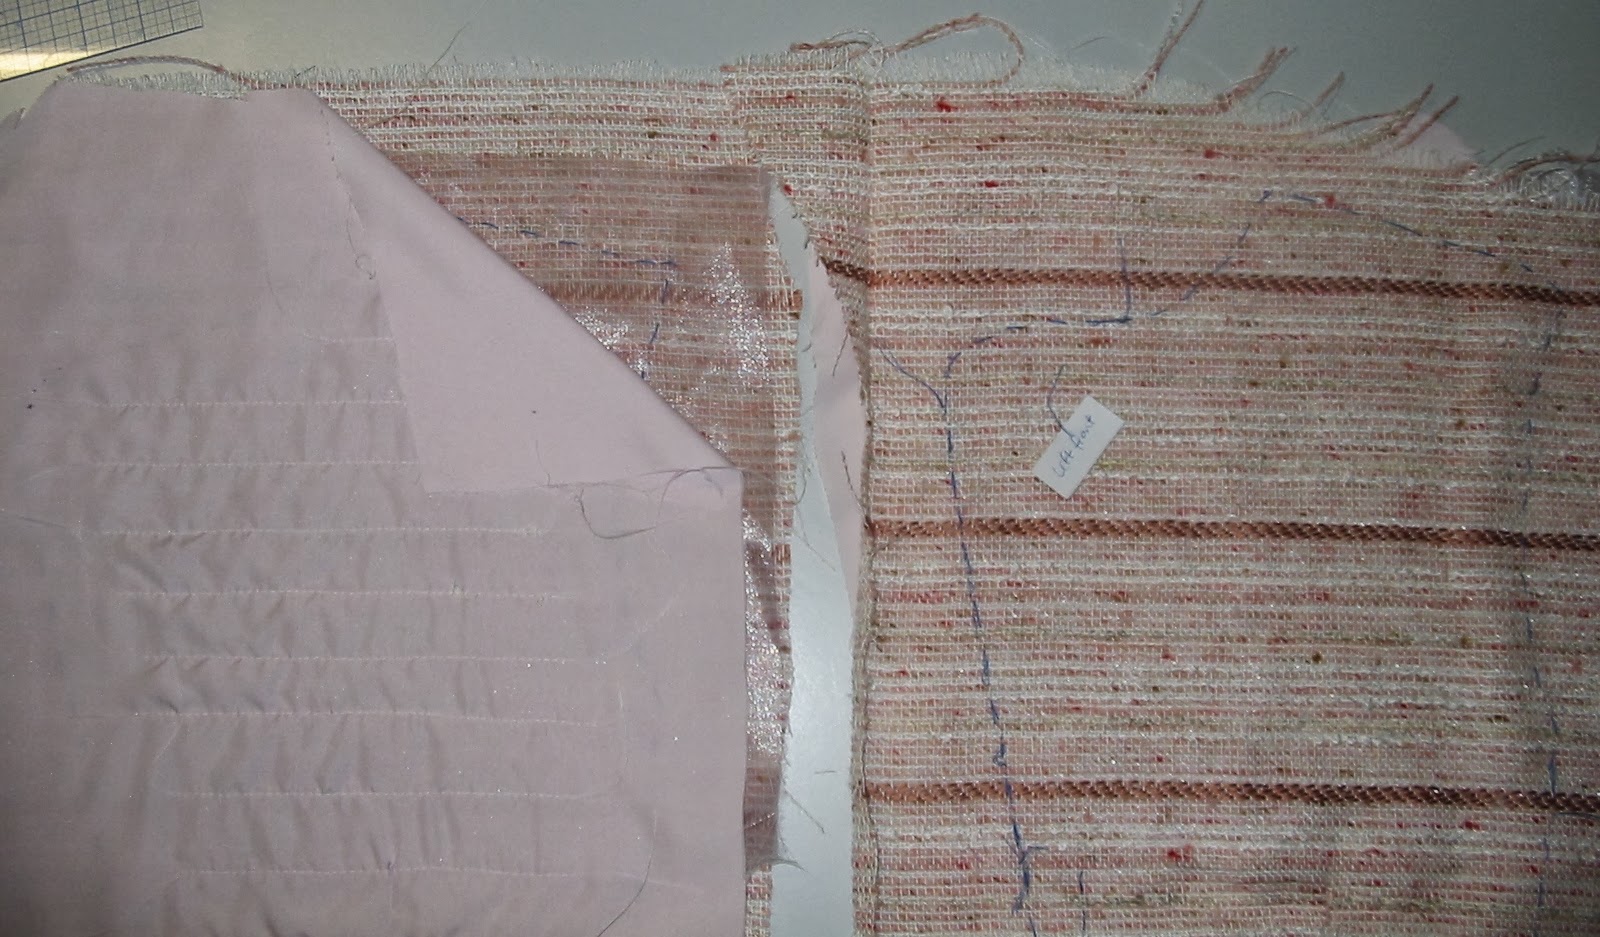
Ok, don't get excited, but we're about to unfold the actual jacket fabric!
I'm using a pink boucle with stripes that I have decided to place horizontally. When I went to take this photo I noticed that the stripes were completely wobbly. I fixed that up quick smart before anyone noticed. Here I have all my upper (non-peplum) pieces that are carefully placed so that hopefully the stripes will line up on the finished jacket. I did the same again with the peplum pieces. The sleeves will be cut after basting the jacket together to better match the stripes. The pieces are placed far apart to make room for huge seam allowances, which enable fitting adjustments later and allow for fraying of the fabric.
I feel like my boys on a long car trip. Are we there yet?
No, we are not!
Once the pieces were roughly cut (above), each one needed to have the outline of each pattern piece hand sewn in running stitch in a contrasting coloured thread (visible below). The shoulder seams then had to be strengthened by cutting a piece of organza to fit the shoulder to the lower armscye and then these boucle pieces were used (still with the muslin pinned in place) to cut the lining for every pattern piece, being careful to match grainlines.
Deep breath. Then came the quilting.
After some trial and error, I decided to quilt in straight lines parallel to the stripes in the fabric. This is done by machine (thank gawd), but has to be an inch in from all sides and 2 inches in from the hem. I used my handy inch gadget thing to measure as I went. The quilting lines were 2-3cm apart and, I'm pleased to say, are invisible in this example (to the right of the inch gadget).
Here we are with the quilting done (not yet ironed) shown from the back and the front, ready to have the threads pulled between the boucle and lining and hand knotted. Yes, every blinking thread. Yes, it took hours. The organza stabiliser is also visible here, as are my sticky labels identifying each piece.
Hooray, we're finally ready to sew something together.
Oh, and just quietly, to the diehard readers who made it this far, that 70+ hours....I think it's an underestimate!
Update: For Part 2 of the Jacket construction, please
click here.


15 comments:
Good on you!
I cheated on the 70+ hours by setting my sleeves by machine...I wasn't planning on it, but it turns out I don't have the patience for 70+ hours.
Your a braver soul than I. It's going to be FAB.
Wow; that is some serious prep work. I am excited to see how it all turns out and the rest of the process.
Oh, brave undertaking! Great pattern choice and I know with your skill and good eye, it'll be marvellous.
Fantastic! I'll love watching yours (& the others) makes while I build up to the time commitment required! Lovely fabric with the wide stripes, I can't wait for your next instalment ;)
So far, so good. Great fabric choice. I am reading this with great interest . . . . I have a 'Chanel' jacket on my 'to do' list, and look forward to picking up some top tips from you!
Oh cool! So glad you're sewing along with this - totally loving your pinky fabric. And yes... totally an underestimate. I finished mine on sunday night just past and had kept track of all the hours spent on it - 164 all up. Ok, so my trim was uber fiddly and took the better part of 12 hours to sew on around the edge and sleeves, and the only thing I machine stitched was the quilting (obv) and the main seam lines. The sleeves and everything else were sewn by hand. It's undoubtably the BEST thing I've ever sewn though! I'm dying to wear it out, too. No occasions on the horizon, so I'm thinking of banging together the mundane and the fabulous and wearing it supermarket shopping this weekend. HA! Can't wait to see how yours turns out :) Have fun!
oh gosh, I hope I can keep up and finish this. Thanks for the tip!
Not brave, just determined! Thank you :)
I know, I had no idea how much was involved!
Let's just say that it had better be after all this work!!
I never would have done this without the sewalong, but I'm glad I have made the effort as I've already learnt so much.
Oooh, I don't know if I have any top tips. I'll certainly let you know if I do, but I would go to the sewalong experts for info :)
Absolutely wear it to the supermarket girl! I think these jackets look good dressed up or down. I can't wait to see your finished jacket. I loved reading about how you made it and you totally inspired me to join the sewalong and give it a go. Woot!
This will be a project to watch. Love your fabric and design.
Post a Comment