Showing posts with label sewing techniques. Show all posts

Sunday 7 September 2014

Ponte pants and another Briar t-shirt


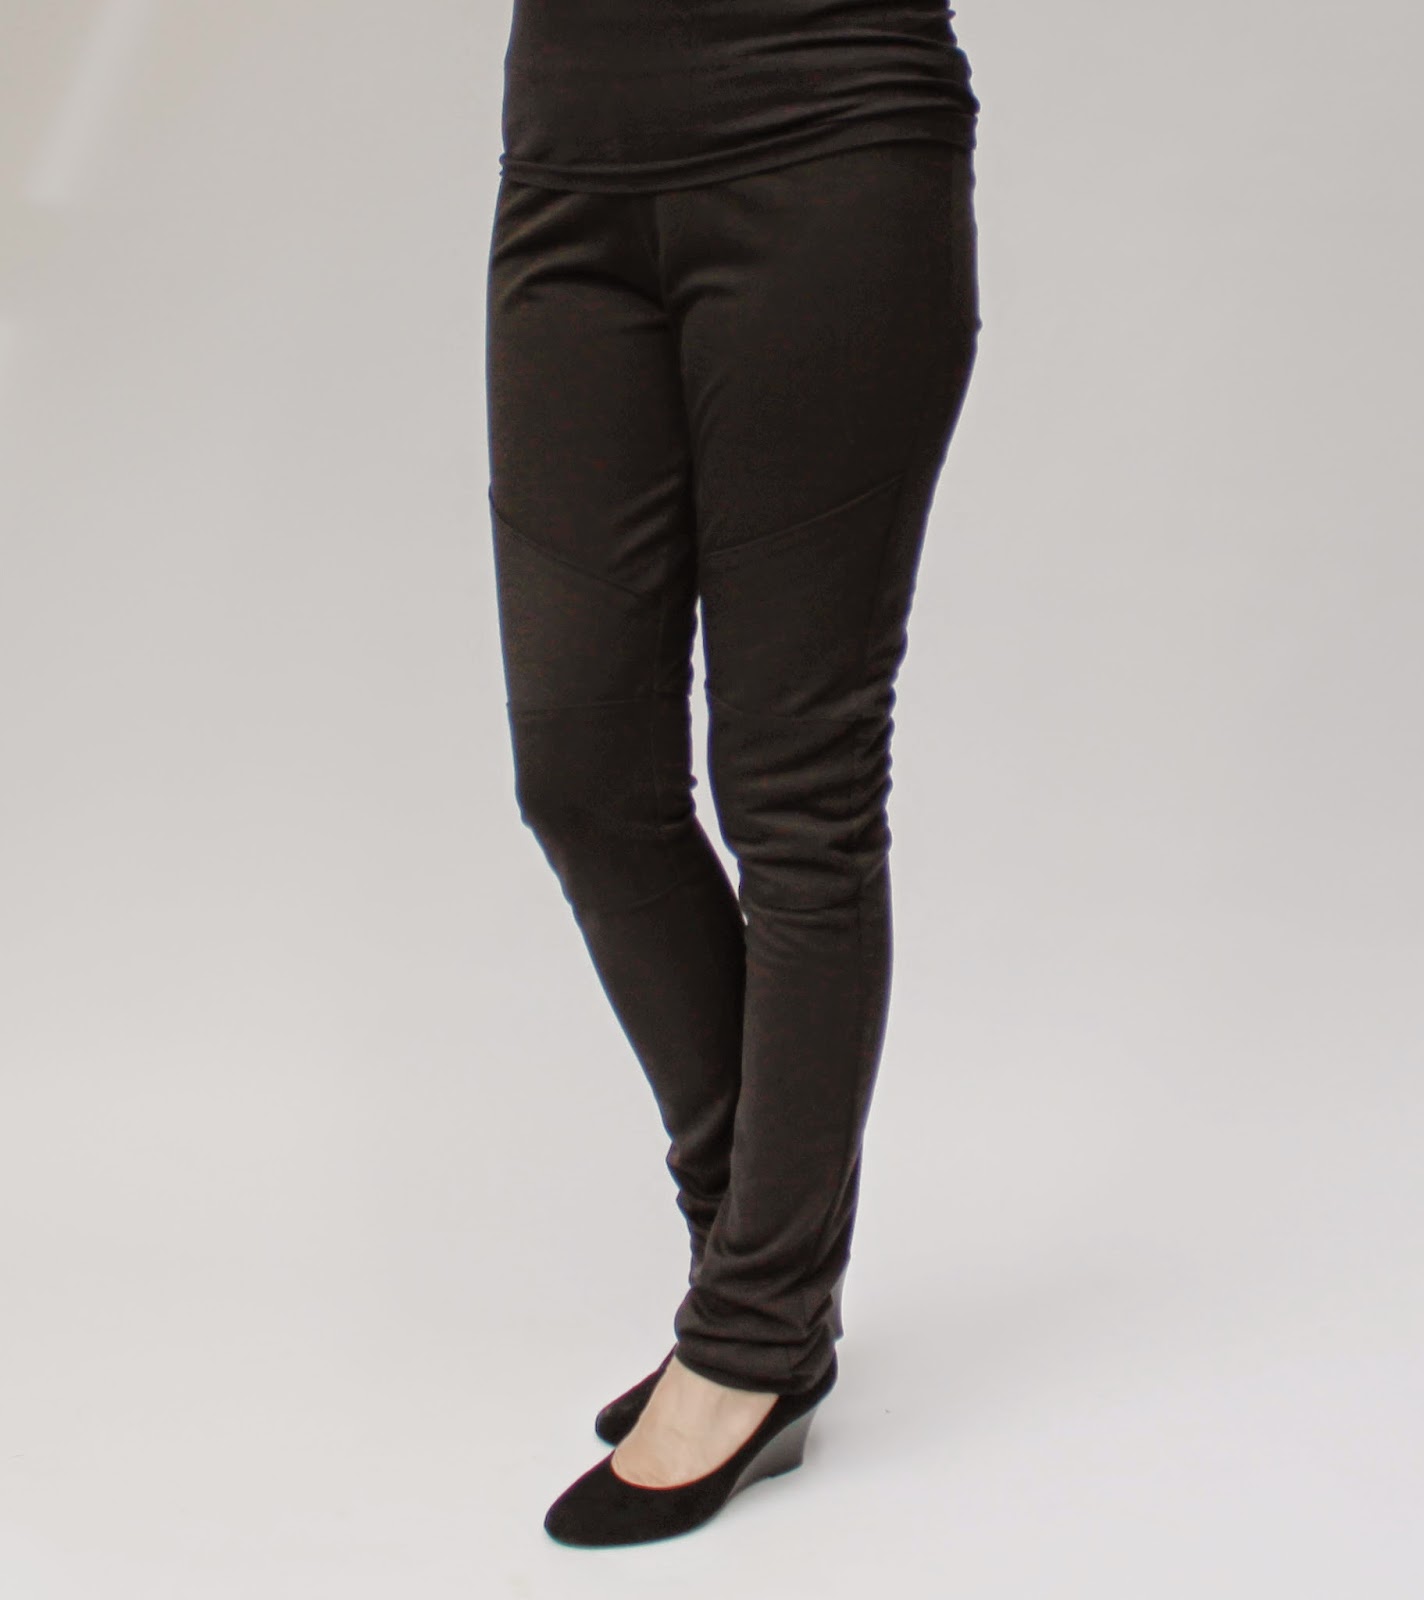
Ponte pants. Ponte pants, ponte pants!


With quilting and knee patches.

Up until a week ago I didn't even know I needed these and now I can't get enough of them.


I liked them so much, I made another pair in black (a bit looser fitting). 


I've lightened these pictures to show the detail.


So comfortable.


And then my sister saw them and requested a pair....with back pockets.


So, here's what happened. I was chatting with my sister and she mentioned that she'd seen someone wearing ponte pants and how great they were and how she'd asked where this person had bought them from and this person said she'd bought them three years ago and they were no longer available. She chatted on a bit more but I wasn't really listening. My mind latched on to the words 'ponte pants' and careered off imagining what such things might look like and, more importantly, how I could make some. I knew immediately that mine would have a slight biker look. When I got home I googled some images and found my inspiration:

My inspiration was this ebay listing
I decided to use the Megan Nielsen Virginia leggings pattern as the basis for these and draw up some pattern pieces for the quilted area and knee patches. I created a side seam (this leggings pattern doesn't have a side seam) and widened the legs a bit to account for the limited stretch of the ponte.

And THEN, I drew up these pattern pieces all proper like so I could make a tutorial and include a download so anyone who also feels that they must have ponte pants can have them tooooo!

But you will have to wait until tomorrow for the tutorial and download. Also, the download will only be my quilted piece and knee piece. The Virginia leggings pattern is copyright, but you can get your own from here or use a different leggings pattern or even trace some of your own leggings and make your own pattern. 

So let's get that leggings pattern ready and tomorrow we'll make some ponte pants!

Oh yeah, and I made this t-shirt with the Megan Nielsen Briar pattern. Stretchy at the front and sleeves, woven at the back with a pleat for movement (described here).


 Oh and one more very exciting thing. Burdastyle recently asked for nominations so they could compile a list of the 50 best bloggers for sewing enthusiasts. AND I MADE THE LIST!!!! I can't believe it. Thank you so very, very, very much to whoever liked my blog enough to nominate me. I'm just happy that anyone wants to read about what I've made. Burdastyle now wants people to vote for their favourite blogs from the Top 50. There are some really great blogs on the list, so it's worth a look.

Until tomorrow xxx

Tuesday 8 April 2014

Great British Sewing Bee Challenge

Sew2Pro

Sewers, you have a week to make a garment inspired by the current series of The Great British Sewing Bee.”

So were the words of Marianna from Sew2Pro last Tuesday.

Source
I LOVE the GBSB. I watched every episode of the first series on You Tube with pure glee and bliss and excitement and roller coaster emotions. Reality TV at its best! Hang on - there's a second series??? And there have already been seven episodes??? Let's just say that several hours over the next three days were spent very happily ensconced in front of the BBC on my computer.  Tip: if you are outside the UK, you can watch the BBC by installing this add-on from Media hint which works on Chrome and Firefox. The episodes will be available until 15th April and the final is tonight!! Get watching people!

So, after emerging, bleary-eyed from watching the first seven episodes (I loved every minute), I started considering Marianna's challenge.

I decided to include several things in my challenge:

- a time limit;
- use fabric from my haberdashery stash;
- use as many techniques from the series as possible in my one garment.

After perusing my stash (that took some time in itself), I decided to use stretch fabric (episode 3) to make a wrap dress (episode 3) and do some pattern matching (episode 2). Marianna kindly provided the link to some of the patterns used in the series and I downloaded the wrap dress. Some detective work revealed that the pattern was actually Butterick 5454.

Butterick 5454
I decided to use some stretch fabric with diagonal stripes for my dress and to cut it in a clever way so that the stripes criss-crossed elegantly and flatteringly at the front and met in a very aesthetically pleasing diamond at the back. No worries mate.

So, with the pattern printed and glued together, I set myself three hours for the challenge.


I think I am a pretty fast sewer. There were no instructions and I knew the pattern matching would prolong the cutting out process, but I thought three hours was doable. Ha! Little did I know....

Dramatic TV moment 1: The pattern matching was a nightmare. 'Like a TOTAL nightmare' as my son would say. I cut each pattern piece from a single layer then flipped that piece to match the pattern and have the stripes going in the opposite direction. But where was the opposite direction? The diagonal stripes meant that each piece had to be flipped 90 degrees, not 180 as I first thought. Oh dear. Knowing that stretch fabric needs to have the greatest stretch going around the body, this was a bit of a spanner in the works. However, after a quick stretch test, I decided that this fabric was of similar stretch up and down as it was side to side, so I just went for it.

I had to cut each piece as I went, rather than being able to lay all the pieces out on the fabric first. I had quite a large piece of fabric ($2 from the op shop - score!) so I thought it would be fine, despite cutting a couple of pieces the wrong way round and having to recut them.

I was wrong.


Dramatic TV moment 2 (head in hands, horrorstruck): The above picture shows the back skirt piece not fitting on my remaining piece of fabric. OK. Recover. Not to worry, I'll just put in a stripe matching patch and no one will ever know...

It took over an hour to cut out all my pieces except the sleeves and the waist tie. I was careful to match the stripes and orient them in the desired direction. I thought I'd got that right.

I thought I had, but I hadn't.

I pressed on. Having that timer running was way more stressful that I expected. The pressure on the actual GBSB must have been so intense.

I started sewing the bodice first. The back was looking good. The front was looking bad. How did the stripes end up in the same freaking direction when I was so careful cutting the pieces?

Then, with little time left, I sewed the skirt. Again, the back was the only reasonable section.

Before I knew it, there was only one minute to go! Very dramatic TV moment.

One minute to go!!!!!
I forced myself to step away from the machine and put the dress on the mannequin.


The bodice and the skirt were still two separate pieces. The edges of the skirt were unfinished, the sleeves and waist tie were not even cut out.


I saw Patrick and May approaching and hid the offending pins.


Fortunately Patrick and May allowed me to go away and finish the dress before they did their final assessment.

I was ready to run fast and far in the opposite direction, tossing the wrap dress in the nearest bin on my way past.

I considered my options. Did I have time to go fabric shopping and start again? I pondered some more and then an amazing thing happened. Project Runway's Tim Gunn murmured in my ear: "Make it work".

Gathering my dregs of enthusiasm for this project I picked up my dress and my timer and forced myself to continue.


It took me another 2 hours and 43 minutes to finally finish.


"The first thing I notice" said May "is that the stripes are all running in the same direction at the front...


...but in four different directions at the back"

"Completely intentional" I lied.

"The pattern matching is not bad in places" said Patrick.

"I love you Patrick" said I.


"And the top-stitching with the twin needle is handled quite well" added May.


I breathed a sigh of relief. Things were looking quite good. Until...


"Oh dear" said May, "what is this seam here? Has a patch been added at the back of the skirt???

"Oh help!"


"Meggipeg, you are the weakest link. Goodbye."

Well, it's definitely not my finest piece of sewing, or my favourite piece of fabric, but I did challenge myself and, despite some stressful moments, I had a lot of fun with this sew.

Is it wearable? Let's see.


It fits.


The back is pretty cool (can you see the patch?).


It could be worse. Actually, I really like this pattern and I challenge myself to get some really lovely stretch fabric (NOT striped) and make it properly next time. In three hours.

Betcha I can.

PS. Thank you to Marianna for a really fun competition.

Monday 13 January 2014

My handmade Christmas Prezzies 2013


I was very busy sewing this Christmas, mostly for my youngest niece who is 18 months old.

I made her a runway collection!


This consisted of:
Blue tank top, flowered and green pants/shorts and flowered cross-over top (flower fabric from Spotlight) - Butterick 3846, size L;
Pink dress - The Warhol dress, free pattern from MADE with an added ruffle at the hemline;
Flower print sun jacket - Kwik Sew 2596, View C, with added sleeves, no peplum and altered at the front so it is open and cool;
Ruched leggings - also Kwik Sew 2596 with a piece of elastic stretched and sewn at the lower outside seam to create the ruching.

Here she is in some of the pieces:

Kwik Sew 2596 (altered)

Kwik Sew 2596 (altered)

Butterick 3846

Butterick 3846

The Warhol dress- MADE

I also made owl cushions for both nieces. I looked at Google images and came up with my own design. I can't find the photo I took of the finished cushions, but here is Miss 18 months unwrapping hers (yes, she is always the centre of attention!):


and again later at home


For my older niece, I made this dress from light and airy, blue patterned cotton. I used Patrones magazine 30 (a recent edition full of children's patterns), dress No. 2. I had purchased the fabric for me, but thought it would be perfect for Miss 8, which it was. I raced back to Textile Traders for some more at the first opportunity!


The neckline and armholes are bound with a strip of lycra, folded in half, stitched to the inside of the dress first and then folded over the edge and stitched again, a variation on this method. The same turquoise lycra is used for the ruching.


I also made a skirt for my sister (not photographed) and these shoe bags for my (hard to buy for) brother-in-law.


Everyone seemed very happy with their meggipeg prezzies and the hard work was all made worthwhile (actually it made my year) when I received this letter from my niece with a picture of her wearing the blue dress and hi-top sneakers I also got for her.


Sunday 29 December 2013

When the world seems to shine, like you've had too much wine...


...that's Amore Amare!

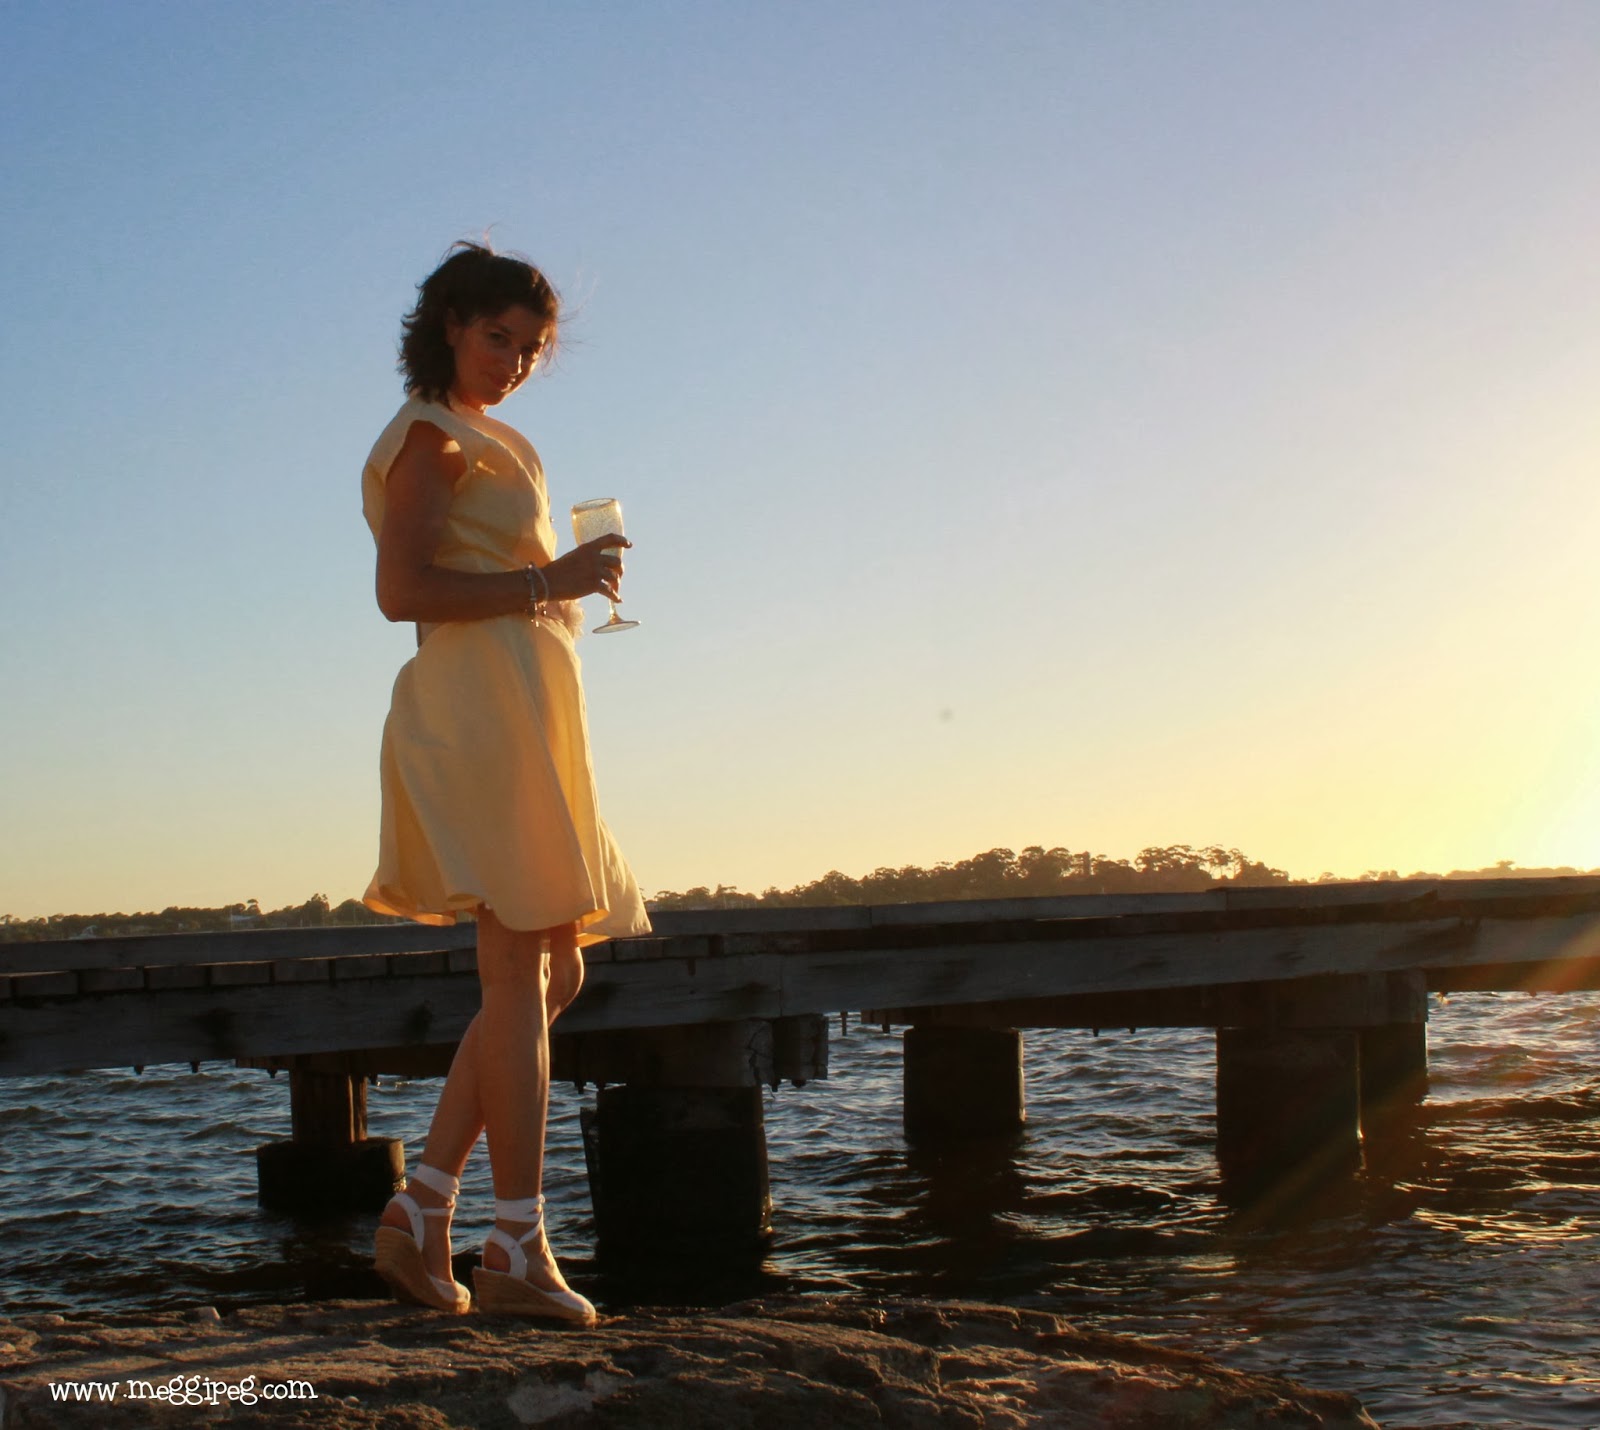
From a Tuscan sun to an Aussie one. The Amare dress pattern by Savage Coco is based on a dress worn by Diane Lane in 'Under a Tuscan Sun'. I feel effortlessly glam in this breezy dress. It is perfect for a soiree by the beach with plenty of cold white wine to keep cool on a warm evening!


There is a full tutorial on Coco's website for making this dress with lots of clear pictures and tips. I always learn something when I make one of her patterns and I love how the details in the tutorials make the dresses come together with a lovely finish inside and out. This dress is probably suitable for an intermediate sewer. It is currently available in size medium, which gave me a perfect fit (I am approximately AU/UK size 10-12, Burdastyle size 38), as a downloadable PDF for US$4.99.


I chose a buttery yellow linen for the dress, which I had bought in Bali some time ago. The quality of the fabric is really lovely and perfect for this dress, although a drapier fabric is actually recommended. The front cross-over panels were cut on the bias and folded double which, along with some other clever construction, gave a beautifully neat finish to the inside of the dress. This double layer at the bust also helps if the fabric is a bit see-through, as mine was. I made a slip to wear under the skirt, but the top was fine as it was with a single button to keep things modest! The bodice has back darts, which give a lovely, blousy shape and the skirt flares out perfectly without adding bulk to the hips. The sleeves are incorporated into the side pieces and are very flattering and summery.


I removed quite a bit from the length of the skirt (approximately 20cm) and a little bit from the cross-over pieces to open up the neckline a fraction. Otherwise I followed the pattern exactly and the fit is spot on. This is an enjoyable dress to sew. I found that the PDF print-out went together easily and the pattern pieces are drafted to fit together perfectly. I couldn't be happier with how this dress turned out. Now I just need some more invitations for glamorous summer events!


I have entered this dress into the 'Cocktail Dress Competition' on Pattern Review. Voting begins on 2nd Jan so hop over and have fun choosing your favourite creation.

LinkWithin

Related Posts Plugin for WordPress, Blogger...