Since it is BOY month I thought I would make something boyish for my first refashion. I used a very old shirt of my husband's, which was rather battered, but I thought it wouldn't matter if this didn't work out. I only used the sleeves, so there is plenty of shirt left for other projects! These turned out a good size for my 5 year old, without sewing or cutting the sleeves at all. If your boy is bigger you could make shorts. If he's smaller you may need to take in the side seams.
Step 1 To start with I laid the sleeves out flat, then placed my pattern piece on so the crotch was in the shirt underarm, the leg was down the sleeve and the waist was down the shirt shoulder.
Step 3 With right sides together, pin and sew/serge the entire crotch seam, matching up seams already in the shirt.
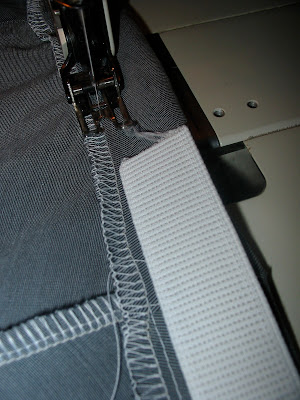
Step 4 Fold over the waistband to make the casing for the elastic. I cheated a bit by serging the edge so I only had to fold it over once. I like to sew the casing slightly wider then the elastic, then do a second line of sewing just below the top of the waistband to create a nice finish. Remember to add a scrap of non-fray fabric or ribbon as a 'tag' to show which is the back. Insert the elastic and finish off casing.
And that's it!!


2 comments:
Love it! New sewer @39 for my almost 1 yr old. Man I read too much and not enough doing. Put this on my list for later. Moved last year before getting into upcycling research. Still lots saved but miss all I gave away. Get to these after playard rail pads for noggin bruises, 1st birthday diapers and shirtw/ tie, upcycled wool shorties and longies...love your blog. Boy DIY is harder to find.
Hi, I'm so pleased you like my blog. I agree that good ideas for boys are hard to find, sometimes you just have to make up your own :) Best of luck with the sewing and upcycling and I hope you come back for a visit sometime!
Post a Comment