Showing posts with label Girls. Show all posts

Thursday 3 January 2013

More Christmas sewing

I was kept very busy before Christmas making presents for my family. I have already detailed the tennis outfit I made for my niece using Jalie patterns 2795 and 3023. 
I also made...

A 'rashie' (lycra swim/surf/sun top) for Mr Meggipeg. His old one was completely stretched out of shape, but I managed to trace a pattern from it and make him a nice new version. He was most pleased and has worn it several times already, some even to go swimming ;)

I rarely convert my overlocker (a Bernina 2500DCET) to a coverstitch machine, but I did for this project and the hem turned out really well. I should do it more often as I forget what to do each time and always spend ages consulting the instructions! This hem was done with a three-thread coverstitch.


For reasons that now escape me, I chose a three-step zig-zag on my sewing machine to finish the sleeves. Maybe I'd already forgotten the coverstich instructions!


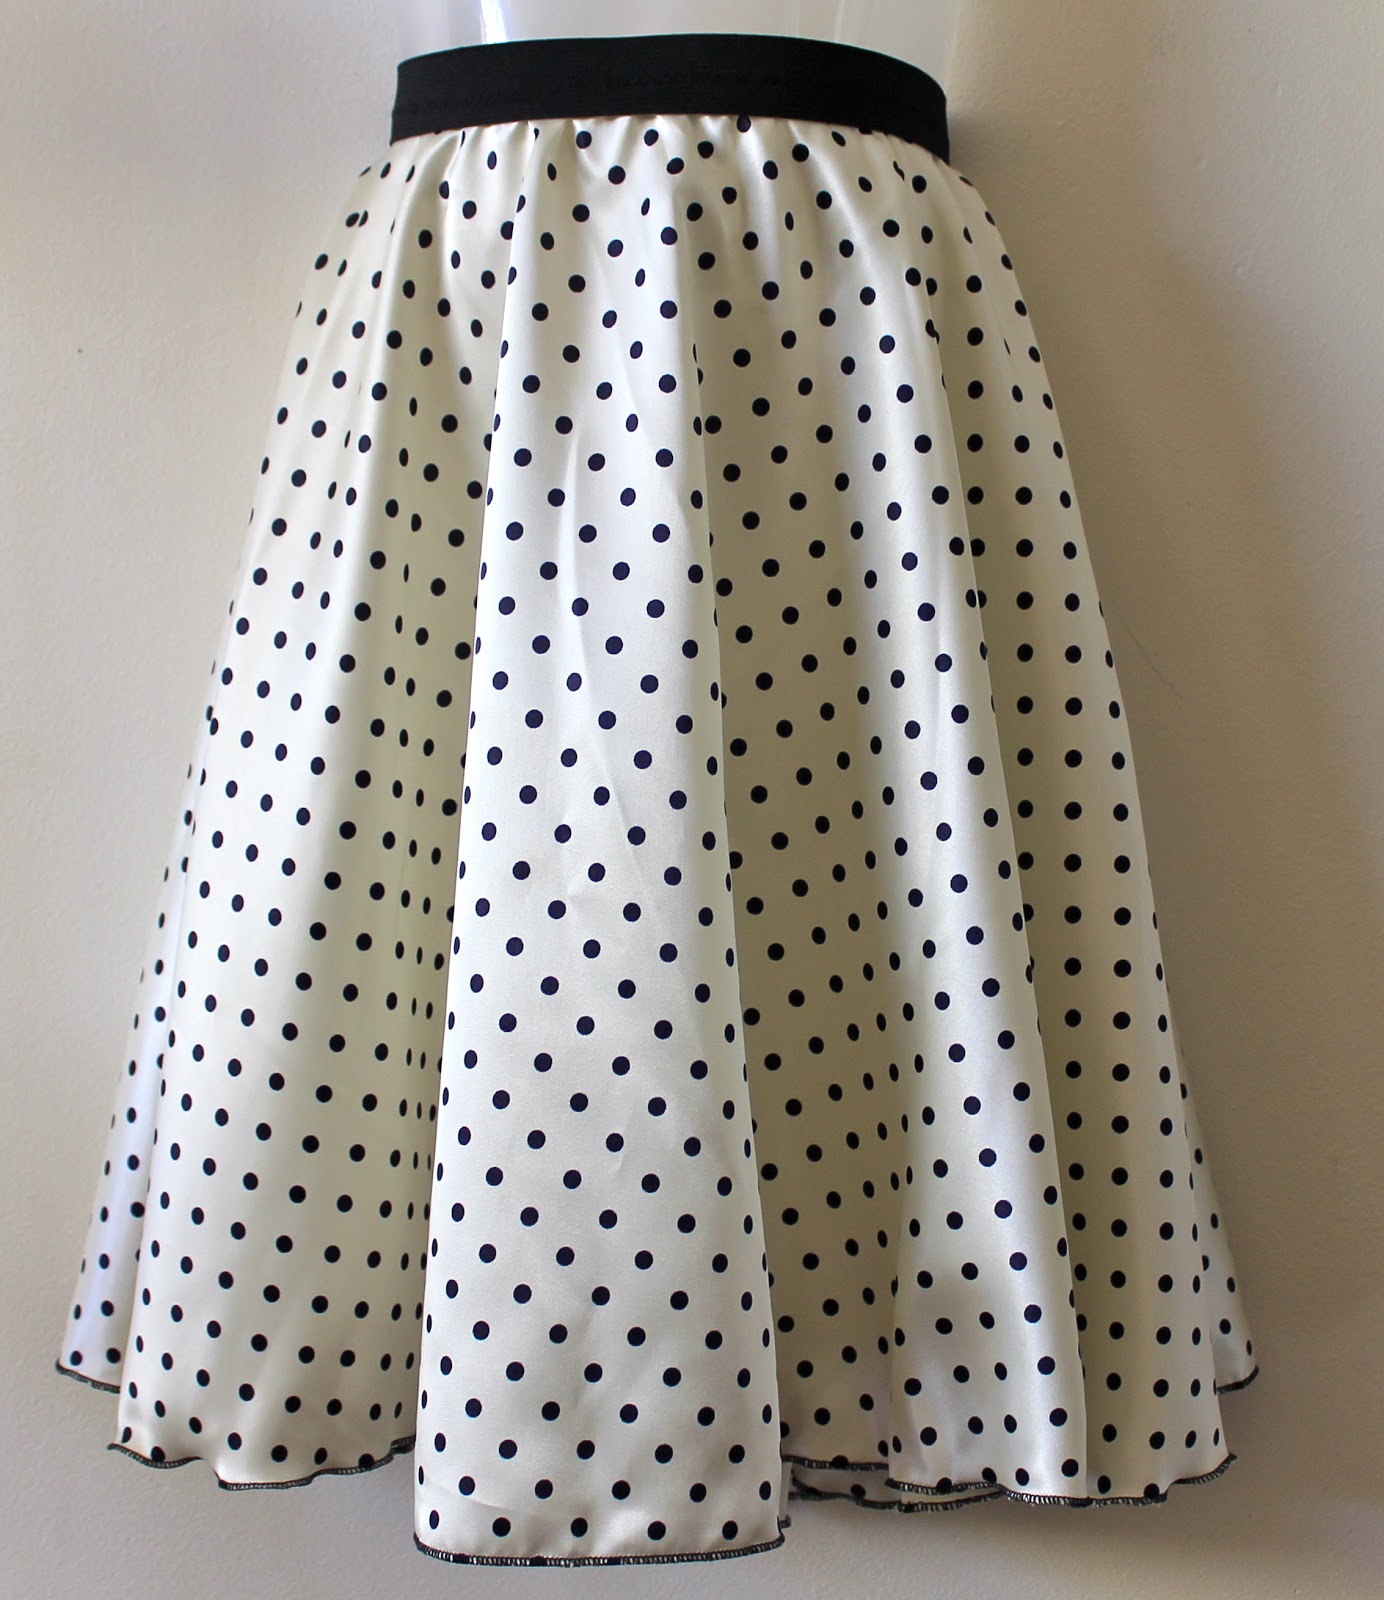
My sister requested some cotton lycra shorts with a stretchy waistband to keep cool and comfortable during our hot summer. I made these for her. They look better on!


To hide the stitching on the turn-ups, I sewed a strip of fabric over the inside seam, just at the bottom where it would show.


Another request was this stretch mesh swimming wrap for my Mum. I surreptitiously traced one she already had and liked. It is basically a large rectangle with two little sticky-out tabs for the ties.


I finished the edges by overlocking the edge, then folding and stitching a 1cm hem with zig-zag.


...and for the littlest member of our family, my 8 month-old niece, I made a swimming outfit from this cute polka dot lycra from Textile Traders. The top is made using Kwik Sew 2596 (also used here for a baby t-shirt) and the pants are made using the tutorial and free pattern by Dana from Made. This is a great pattern if you are looking for a baby gift.


I added ruffles to the back of my version using strips of pink lycra. I also finished the sleeves with the same pink fabric, just folded in half and stretched slightly as it was sewn on (as for fold-over elastic).


Awwww, so cute!

Finally, I made a hat to go with the swimming outfit and some very light pants to protect that delicate skin from the sun when she is riding in the pram (both using Butterick 3846 in size M). The pants are made with printed muslin from Textile Traders and finished with more pink lycra used as fold-over elastic.


The hat turned out a little large so I added a button and elastic loop to keep it out of her eyes until she gets a bit bigger!


Modelling the pram pants!


Phew! I'm looking forward to some me-sewing now :) Fortunately my sister gave me 'Drape Drape' and 'Drape Drape 3' for Christmas (I already have No. 2, also from my sister for my last birthday - she knows me well). Fire up the sewing machine. Yee ha! (or whatever 'Yee ha' is in Japanese).


Saturday 29 December 2012

Anyone for tennis?


I did lots of sewing for Christmas presents this year, mostly for my two sweet, little nieces. The biggest project was this tennis outfit, which was made according to stringent requirements stipulated by Miss 7. She wanted a college-style jacket with a zip and short sleeves and the number '64' on the back.

I immediately remembered that Andrea (and her daughter) of Fabric Epiphanies had used Jalie pattern 2795 to make a boys college jacket. I also have this pattern, so that was my starting point. I decided to make a little matching skirt using Jalie pattern 3023.


 I made the jacket first using white stretch mesh fabric for the main jacket with contrasting pink knit fabric for the waistband, collar, cuffs and pocket welts.

Before sewing the jacket together I made the number applique for the back. I searched the internet for 'college fonts' and found one I liked. I couldn't get it to install for some reason, so I copied the font picture into Word, cropped and resized it, then printed it out. I traced the large outer number on to the glue side of some fusible interfacing and fused it to a scrap of pink fabric. I pinned it to the back jacket piece and sewed it on with a narrow zig-zag stitch.  I repeated the process for the inner number with white fabric and sewed it to the pink number.


I made the jacket according to the pattern instructions in a size J. I chose the size based on exact measurements. If I was making this again I would go up a size or two as it just fits now with no growing room! The upper/top sleeve is made from two pattern pieces, one finishing at short sleeve length and one to make a long sleeve. I just used the piece that finished at short sleeve length along with the the two lower sleeve pieces, which I shortened accordingly. I finished it off with a cuff of pink fabric.

The collar was made with a long strip of pink fabric that I tapered at the front edges to get the 'college' look. This led to a slight problem with the upper zip edge, which would normally be hidden inside the jacket collar. I overcame this by adding a scrap of fabric to each side of the top of the zip. The process took a bit of trial and error so I made myself some instructions in case I ever needed to do this again (see below).

The zip was attached to the jacket leaving the last 3cm unstitched. I cut two pieces of knit fabric 6x2cm, folded each in half and stitched about 0.5cm from the long edge. This was turned right side out and the corner placed over the upper edge and teeth of the zip. I used a narrow zig-zag stitch to attach the fabric to the zip, then trimmed off the excess, sewed in the zip and topstitched. This gave quite a neat finish.

I added a little heart charm for extra girliness.


For the skirt, I used the Jalie 3023 skirt pattern without the sewn-in pants. I used a size K this time, one size up from the measurements I had, but again, this only just fits! I made the waistband from white cotton lycra as the mesh did not have enough stretch. I added piping in pink and a smaller number applique done as described above.


This outfit took a lot of time and I agonised over the size before Christmas day. I had my 7 year-old son try it on numerous times to check the fit (he is a very tolerant child!) and I almost made another in a bigger size, but my sewing machine suddenly died on Christmas Eve, so that was the end of that idea!

I watched little Miss 7 open her present with bated breath. Would she like it? Would it fit? Would she wear it?

She loved it.

Her beautiful, sparkly Christmas dress was cast aside as she rushed to put on her new outfit. She wore it all day and, by all accounts, has worn it every day since. I don't know who's happier, she or I :)


Oh, and the other good news is that my sewing machine has been fixed by the amazing man at Cockburn Sewing Centre. He has performed miracles on my machine and I highly recommend him to anyone local to Perth. Life is good for Auntie Meggie :)

PS: this outfit has been entered in the 'Sewing for children' competition on 'Sewing Pattern Review'. It would be great if you could vote :)

Tuesday 20 November 2012

27 Dresses...well skirts actually


My sons' hip hop dance class consists of three boys (including my two) and 27 girls!

One of their dances for the end-of-year concert has a 50s theme and I was enlisted to make circle skirts for the girls. I did volunteer my sewing skills, but the dance teacher was rather apologetic when she told me how many skirts she needed!

I needed no excuse to go to the fabric shop for supplies. I bought 30m of polka dot fabric in two colours - white with black spots and black with white spots, 20m of black elastic and some overlocker thread. I had planned to make my own pattern, but then I found a pattern for girls' circle skirts (Simplicity 7401) in the op shop for 20c. Must have been fate!


 I modified the pattern a bit and made three sizes (6, 8 and 10 years) on sturdy brown paper. Then I got cutting and sewing.

Here is a finished skirt.


I wanted the skirts to be as quick and simple to make as possible as there were so many. They needed to look good on stage, but it was fine if they were a little rough on the inside! The pattern suggested attaching a separate casing for the elastic waistband, but I made them with an exposed elastic waistband instead.


The waistband was attached by dividing the elastic and the skirt waist into quarters, stretching each elastic quarter to fit each skirt quarter and attaching the skirt with a simple zig-zag stitch. This can be seen more easily from the inside. Of course, simple ribbon size labels were a must.


 After a while, I got a bit of a production line happening where I grouped the skirts into sizes then did all the side seams, followed by the elastic waistbands. Once they were all made, I changed the overlocker to rolled hem mode and went for it. Metres and metres of rolled hems. It was quite therapeutic actually, although I had to chase the overlocker around the table if I went too fast :)


I calculated that, once they were cut out, each skirt took about 15-20 minutes to make.

Done!

Thursday 6 September 2012

Twirly, girly skirt


I made this skirt for my English cousin's sweet little daughter who is nearly one. I designed this skirt a while back and have made quite a few on a similar theme, but each is a little different - to keep things interesting for the sewist ;) This one has a double layered circle skirt with tulle trim and flower brooches. The skirt is made from velvet knit and the waistband is stretchy, which is useful when you don't quite know the size required, or if the child is growing quickly!


This is my go to skirt when I need a present for a little girl. I also have some for sale in my Etsy shop.

I'm just looking forward to a photo of my little cousin once removed (I had to google that one!) wearing this skirt. She is such a sweetie.

Wednesday 2 May 2012

Sewing for a new Mum and baby

1 day old
The best thing ever has happened this week, my sister has had a baby! What's more, it's a girl so naturally I have been sewing up a storm of girly gorgeousness. This is my second niece and it's so lovely to have a girly outlet after sewing for my own two boys. Sewing for boys and girls is just so incredibly different. My sons always want something understated and 'cool' whereas I can go crazy with tulle, ruffles, hearts and flowers for the girls and they lap it up.

Here is what I've made so far:

The first thing I made was this breastfeeding top using Jalie pattern 3132. It is made from thickish t-shirt fabric. I was really pleased with this (modelled here by me) and my sister loves it. I will blog more about this soon.


Then I made this little outfit using Simplicity 7807. I made the newborn size, but it has turned out more like a 12 month size. In fact, my 6 year old could probably wear the pants (if he were that way inclined). This outfit was made with scraps left over from this baby blanket, then embellished with appliqued hearts and ribbon and finished with a strip of pink ribbing folded and stitched with a twin needle. It is pieced together based on the sizes of scraps I had. I think it turned out pretty cute.


After seeing the size of the above outfit, I quickly returned to the drawing board to make something that would fit the baby now. I used a 6 month size bodysuit to trace a newborn-sized pants pattern and made some weeny trousers from scraps of the knit fabric I used to make the breastfeeding top. Again I had to piece fabric together to have enough. This time I used a strip of printed jersey down the sides of the pants and some more to make a matching hat. The hat was made using this simple tutorial found on Freeneedle.


The 'ears' are tied together to make this cute design.


This outfit turned out well and was very quick and easy. I'm pleased to say that it fits and has already been modelled by this little sweetheart (one day old in these pictures).


My two beautiful nieces

My boys with their new baby cousin

I don't usually put lots of family photos in my blog, but this time I just couldn't help it. I am so besotted by this sweet little girl. I was living in England when my sister had her first baby so I missed out. I am not usually a baby person, but this one has captured my heart. My boys and my niece are also completely in love with her and have talked of nothing else since she arrived. A very special time in all our lives 


Monday 20 February 2012

New outfit in my Etsy shop


I have been working on a new design and here it is! The 'Buttons of blue' outfit is now available for sale in my Etsy shop. Currently available in size 3-4. More sizes coming soon! I am happy to take requests for sizes, but I have limited fabric available so get in quick.
 

Tuesday 27 December 2011

Easy fairy doll tutorial


These sweet little fairy dolls are so simple to make and they are sure to capture a little girl's heart. Perfect for hanging on the Christmas tree or bringing a smile to your face anytime.

This would be a good craft to do with a child. You could make all sorts of individual little characters.

Let's get started...

...for one fairy you will need:


- a wooden bead with a hole drilled through it
- a pipe cleaner
- scraps of fabric and ribbon or string
- wool, tulle strips or rope for hair
- marker pens
- any other embellishments you fancy eg. fake flowers, sequins, glitter

To make your fairy:

Cut a scrap of fabric into a circle of approximately 12cm or 5" in diameter. Cut a small hole in the centre. Also cut two arm slits roughly where the '2' and '3' are on the tape measure

Cut the pipe cleaner in half and fold one half in half again.

Poke the folded end through the hole in the bead and open it out.

Poke lengths of wool, tulle (or whatever you like to use as hair) through the hole in the pipe cleaner. Also poke through a piece of string or ribbon to hang up the finished fairy. I added a fake flower to this one.


Pull the pipe cleaner back through to firmly hold the hair in place and open out the ends. These will become the arms.

Fold the other half pipe cleaner in half and wind it around the fairy's neck a couple of times to secure it.

Twist a few times to form the body and legs.

And it's time to get dressed. Poke the body of the fairy through the hole in the dress and pop the arms through the slits.

Tie a ribbon around the waist of the dress.

Draw on a face, make any minor wardrobe and hair adjustments...and she's done!

I made lots!


You could add wings, sequins, glitter, hats. Go wild and have fun. I would love to see pictures of any you make. Email me or post them on my facebook page and I may feature them here.


I will be sharing this with some of the link parties listed at the bottom of the page.

LinkWithin

Related Posts Plugin for WordPress, Blogger...