Showing posts with label StyleArc. Show all posts

Thursday 23 February 2017

StyleArc Twiggy Dress


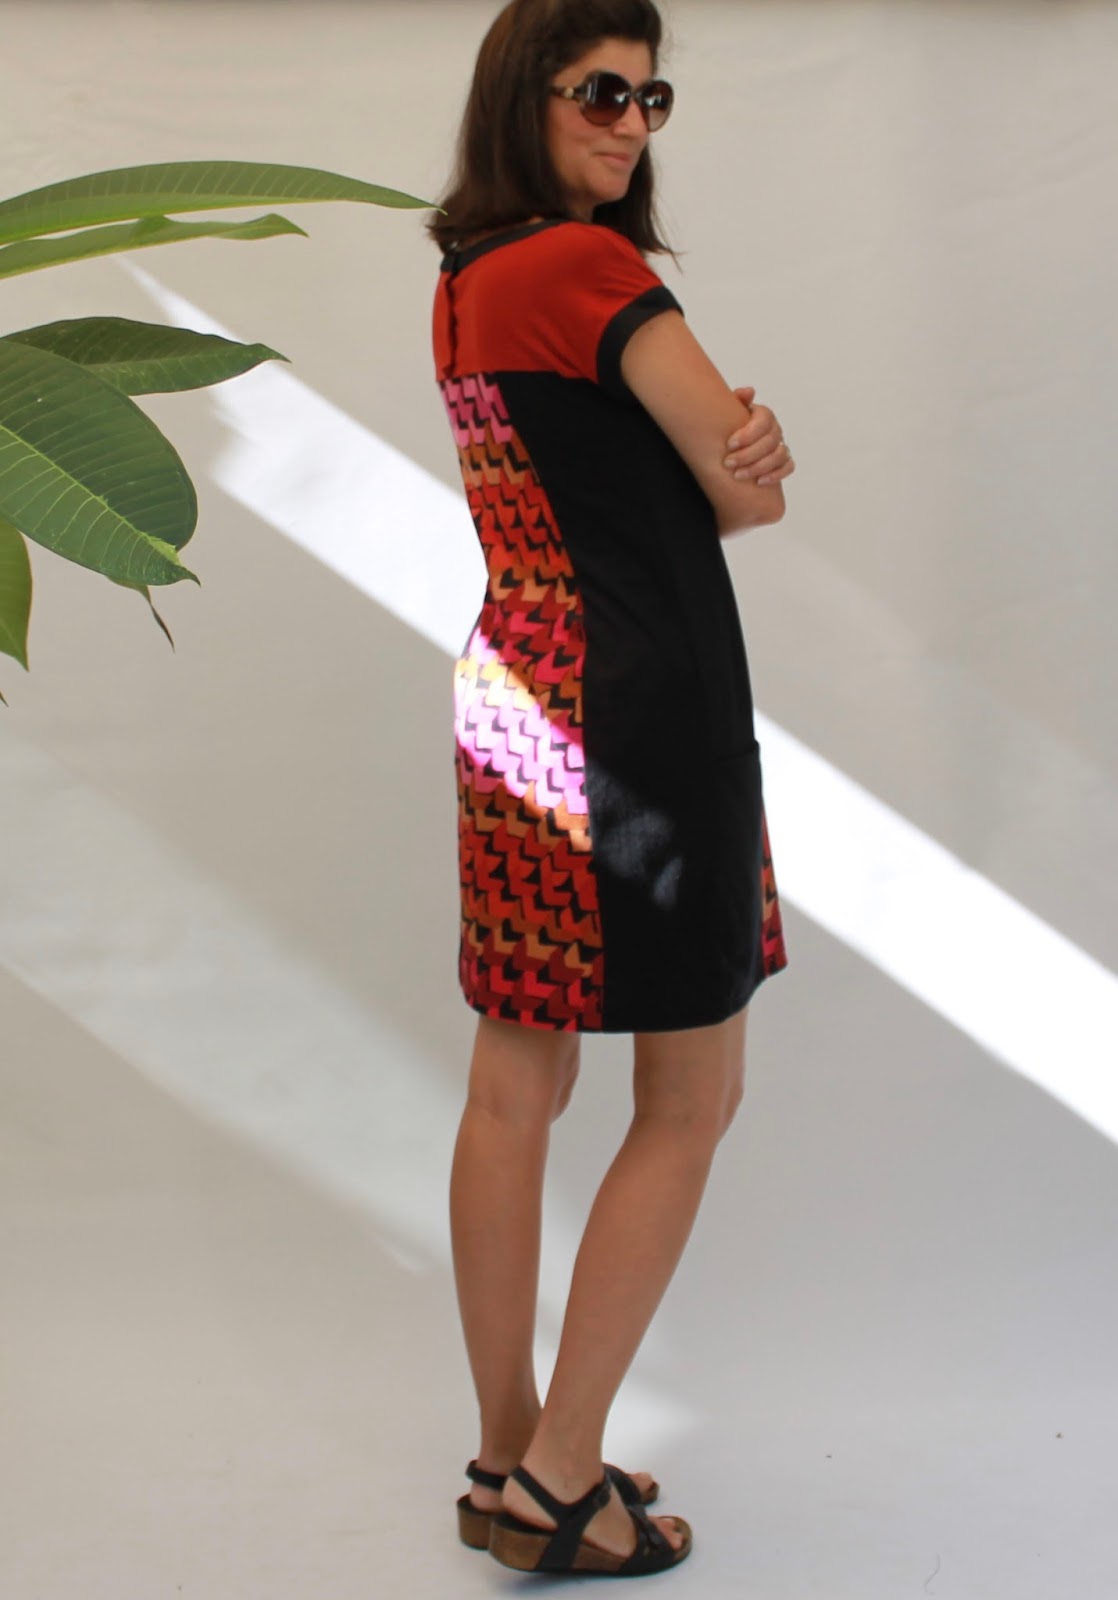
I bought the StyleArc Twiggy pattern ages ago and have only just got round to making it. It's a knit dress with several panels, so I went through my remnants to find some fabrics that worked together. The front and back panels were leftovers from my Xerea dress. I chose black for the sides for a slimming effect and a coordinating reddish scrap for the yoke.


This is slightly more fiddly to sew than it first appears, but is not difficult. The hardest part was the neck and sleeve bindings, which are shaped and sewn on to create a double layer. Care was needed to get them neat. The buttons were easy, but the instruction was a bit confusing: 'Bag out the button steps on the base of the right and left yoke'. This rather cryptic sentence simply meant to fold the centre back yoke edge right sides together at the notch, stitch the bottom from the edge to the notch and fold out again (wrong sides together) to get a neat edge below the buttons. Repeat for the other side. I didn't bother with buttonholes or a zip as the dress is easy to slip on as it is.


The main change I made was to add pockets. This was easy to do as the front side panels are the perfect pocket width. I cut the side panel pattern piece where I wanted the top of the pocket to be and added seam allowance (SA) to the lower cut edge. I added the length of the pocket plus SA to the upper cut edge and cut another piece of black fabric the length of the pocket by the width of the side panel plus SA at the top and bottom. I then sewed the pocket to the top of the lower side panel, stitched the bottom of the pocket to the upper side panel and then used the side panel as normal. Clear as mud? Good.


The fit was great without any modification except to take in the back waist a bit between the back and side panels.


This is a great pattern. It's a simple design with some eye-catching details and is a great opportunity to finish off some scraps. I'll definitely be making this again.

Tuesday 13 December 2016

StyleArc Adeline Dress


I have had this StyleArc Adeline dress on my mind ever since I saw Lauren's version on Instagram. I delayed buying the pattern while I tried to justify to myself that it was sufficiently different to the Named Inari and Merchant and Mills Camber patterns that I already have. I further tried to justify to myself that I needed yet another pattern to add to my overflowing pattern cabinet. Then came the Black Friday sales and, well, resistance was futile!


I made this from khaki linen from my stash. I am trying to use my stash for everything lately as it's getting beyond a joke and taking over the entire house. I think this fabric came from Remida.


I constructed the dress with French seams throughout and topstitched them down. I also shortened the dress by about 5cm. I made my usual StyleArc size 10.


I just love the easy, relaxed style of this dress with the wide neckline facing, deep pockets and slightly hi-low curved hem.


The sleeves have a wide hem so they can be turned back without internal seams showing. It's a very well designed pattern.


I decided when I had finished the dress that khaki wasn't really my colour, so I dunked the dress in my trusty indigo dye vat. My indigo is fairly pale and didn't do much to the khaki. However, if you look closely, it seems to have dyed some of the fibres more than others resulting in a lovely depth of colour that I'm quite pleased with.


I just love this pattern and the dress is very stylish, comfortable and easy to wear, which is pretty much everything I look for in a dress.

So what have I learned?


Well obviously that I should go with my intuition and just buy all the patterns!

Along with several more boxes to put them all in...


Saturday 6 August 2016

The refashioners 2016 - Mondrian Dress from jeans


One of my favourite things is seeing the before and after pictures of a good refashion, so I've been gleefully watching the fabulous refashions rolling in on The Makery this month. So good!

This year the Refashioners refashion must use jeans. I've already done a jeans refashion this year and have worn the dress so often, that I thought another denim dress was in order.

The idea for this dress came to me one night as I was drifting off to sleep. I always think about sewing as I go to sleep...


Enter the Mondrian-inspired denim dress AKA the StyleArc Charlotte Dress


I raided my old jeans drawer (after I remembered I had an old jeans drawer) and found three pairs of my old jeans in different coloured blue denim. It took me an entire day to work out which colour to put where, how I was going to fit the pattern pieces on the jeans and then to cut out the dress. 

Annoyingly, when I opened up the side seams to get larger pieces of fabric, the jeans wouldn't lie flat due to the curved bootcut seams. I had to unpick and resew areas of the seams to get a flat piece for my large front and back pieces and even then I had to insert a couple of sneaky darts. 

Where I could I used features of the jeans to add some interest. This was the original back pocket and side rivet.


I cut the front and back dress pieces so the original seams were as symmetrical as possible up and over the shoulders. Where I could I used the original hemlines and frayed them above the hem band.


Once the dress was sewn together, I harvested labels, pockets and buttons from the jeans (my unpicker was working overtime) and sewed them to the dress.


One of the labels got an upgrade!


Back pockets.


A button fly and coin pocket on one side.


A label overstitched to the back shoulder.


I am thrilled with the end result of this dress. I am hoping that I've retained the simple and classic look of the Mondrian design and that the added jeans features add a bit of refashiony coolness. Whatever, I'm going be wearing this a lot and washing it often to get more fraying and fading happening.


Thank you to Portia for the fantastic Refashioners series and competition and to the celebrity refashioners for the sewing eye candy and inspiration.


Chop chop everybody!


Thursday 16 June 2016

StyleArc Elle pants and Amber top


I have made so many pairs of these pants, but have never blogged them! They are a sleek and simple design, made with very stretchy, woven fabric. Make sure your fabric is very, very stretchy, or you won't get them on. Ask me how I know this!

Note: discount code for this pattern at end of post.

StyleArc Elle Pants
At first, I made them from bengaline, as recommended by StyleArc, and they were fabulous. I have a picture of some black bengaline ones from an old post about my Splattered Jacket.


More recently I have been hacking them to look like jeans. I have made three pairs like this, but only photographed the white pair so far. I am really pleased with these. They look like jeans, but are soooo stretchy and comfortable they feel like leggings.


Don't tell anyone they are almost jeggings!


I took a few photos while I was making these to show how I made them look like jeans.

To start with, I added a mock fly front, by adding some fabric to the front crotch curve at the cutting out stage. I used my Jamie jeans pattern for the fly curve, but you could just draw it freehand.


I marked the original front edge line on the fabric and stitched 1cm away from it, to account for the seam allowance.


The right side was then topstitched to look like a jeans fly.


Next I made back pockets, also from my Jamie jeans pattern. It would be simple to copy some from existing jeans. I did the inner line of topstitching before I sewed them in place.


I sewed them on according to the pocket placement markings on my Jamie jeans.


That's it.


The top I'm wearing is also StyleArc. This is the Amber top, which I have previously made from Japanese cotton. For this one I used woven cotton for the front and back and cotton knit for the sleeves and detailing. To make it I sewed the side seams together first, then folded it shibori-style and dyed it in natural indigo. I also dyed the sleeves, yoke and front stripe. Once everything was dry, I sewed the rest of the top together.


This technique ensures perfect pattern matching at the sides!


A perfectly, secretly, comfy outfit!

To get this pattern for 20% off, visit the StyleArc Gumroad shop and enter the code meggipeg20. I will receive a small percentage of any sales made. UPDATE: this code may no longer be valid.

Thursday 9 June 2016

StyleArc Estelle Jacket, Lola pants and Toni top


I seem to have been wearing a lot of StyleArc lately. I just can't help but reach for these easy and comfortable pieces that make it look like I've actually thought about what I'm wearing! This combo is made up of Lola pants, of which I've made many, the Toni dress pattern cut off into a top (my dress is here) and the Estelle ponte jacket.


I've talked about the Lola pants and Toni dress before, so let's start with the Estelle jacket. I love this pattern. It's super easy to make, but looks really stylish. Sorry about the dark photos, I've lightened some of them to make the details easier to see.


The jacket uses ponte, mine is from Textile Traders, so the front edges, neckline, hem and cuffs are all left raw. That means that all you need to sew are the back, shoulders, sleeves, sides and collar. Oh, and the pockets. So quick and easy!


The cut of the front means that it drapes perfectly with no effort or fussing to get it into place.


The back is cut at mid thigh and the front dips slightly lower.


The simple design makes it easy to change the length and shape of the jacket. I have just made another one of these that is shorter due to fabric limitations. It looks great.


Next the top. This is from the Toni dress pattern (you might remember me wearing the giant flower). I wanted to try it cut off into a top, so I used this cheap fabric to try it out. I really love the result and need to make it again in a better fabric.


The pants are Lola pants and I just love these. I've made them numerous times, including a couple of pairs changed to have patch pockets and elasticated cuffs.


I am so pleased with this outfit. It couldn't be more comfortable and it was all easy to make. Isn't sewing just the best thing ever?

LinkWithin

Related Posts Plugin for WordPress, Blogger...